Joana Doce
Easy, Delicious, Gluten - Free Recipes Anyone Can Make
Recipe Posts
Peixinhos da Horta in the Air Fryer

Ingredients
500 g green beans
1 cup all-purpose gluten-free flour
1 cup ice-cold sparkling water
2 eggs
Salt (to taste)
Black pepper (to taste)
Cooking spray or a little olive oil
Lemon for serving (optional)
Serves: 4 to 6 people
Preparation time: 20-25 minutes
Instructions
Prepare the green beans:
Wash the green beans well and trim the ends.
Boil the green beans in salted water for about 5 minutes, until slightly tender but still firm. Drain and let cool.
Prepare the batter:
In a bowl, whisk the eggs and add the ice-cold sparkling water, mixing well.
Gradually add the flour, stirring until you have a smooth and slightly thick batter.
Season the batter with salt and black pepper to taste.
Coat the green beans:
Dip the boiled green beans into the batter, ensuring they are fully coated.
Cook in the Air Fryer:
Preheat the Air Fryer to 180°C (350°F) for 5 minutes.
Place the coated green beans in the Air Fryer basket in a single layer, avoiding overlap.
Lightly spray with cooking spray or brush with a bit of olive oil.
Cook for 10-15 minutes, turning halfway through, until golden and crispy.
Serve:
Serve the Peixinhos da Horta hot.
If desired, accompany with lemon wedges for squeezing on top.
Tip: Cooking time may vary depending on your Air Fryer model. Check the texture during cooking and adjust as needed.
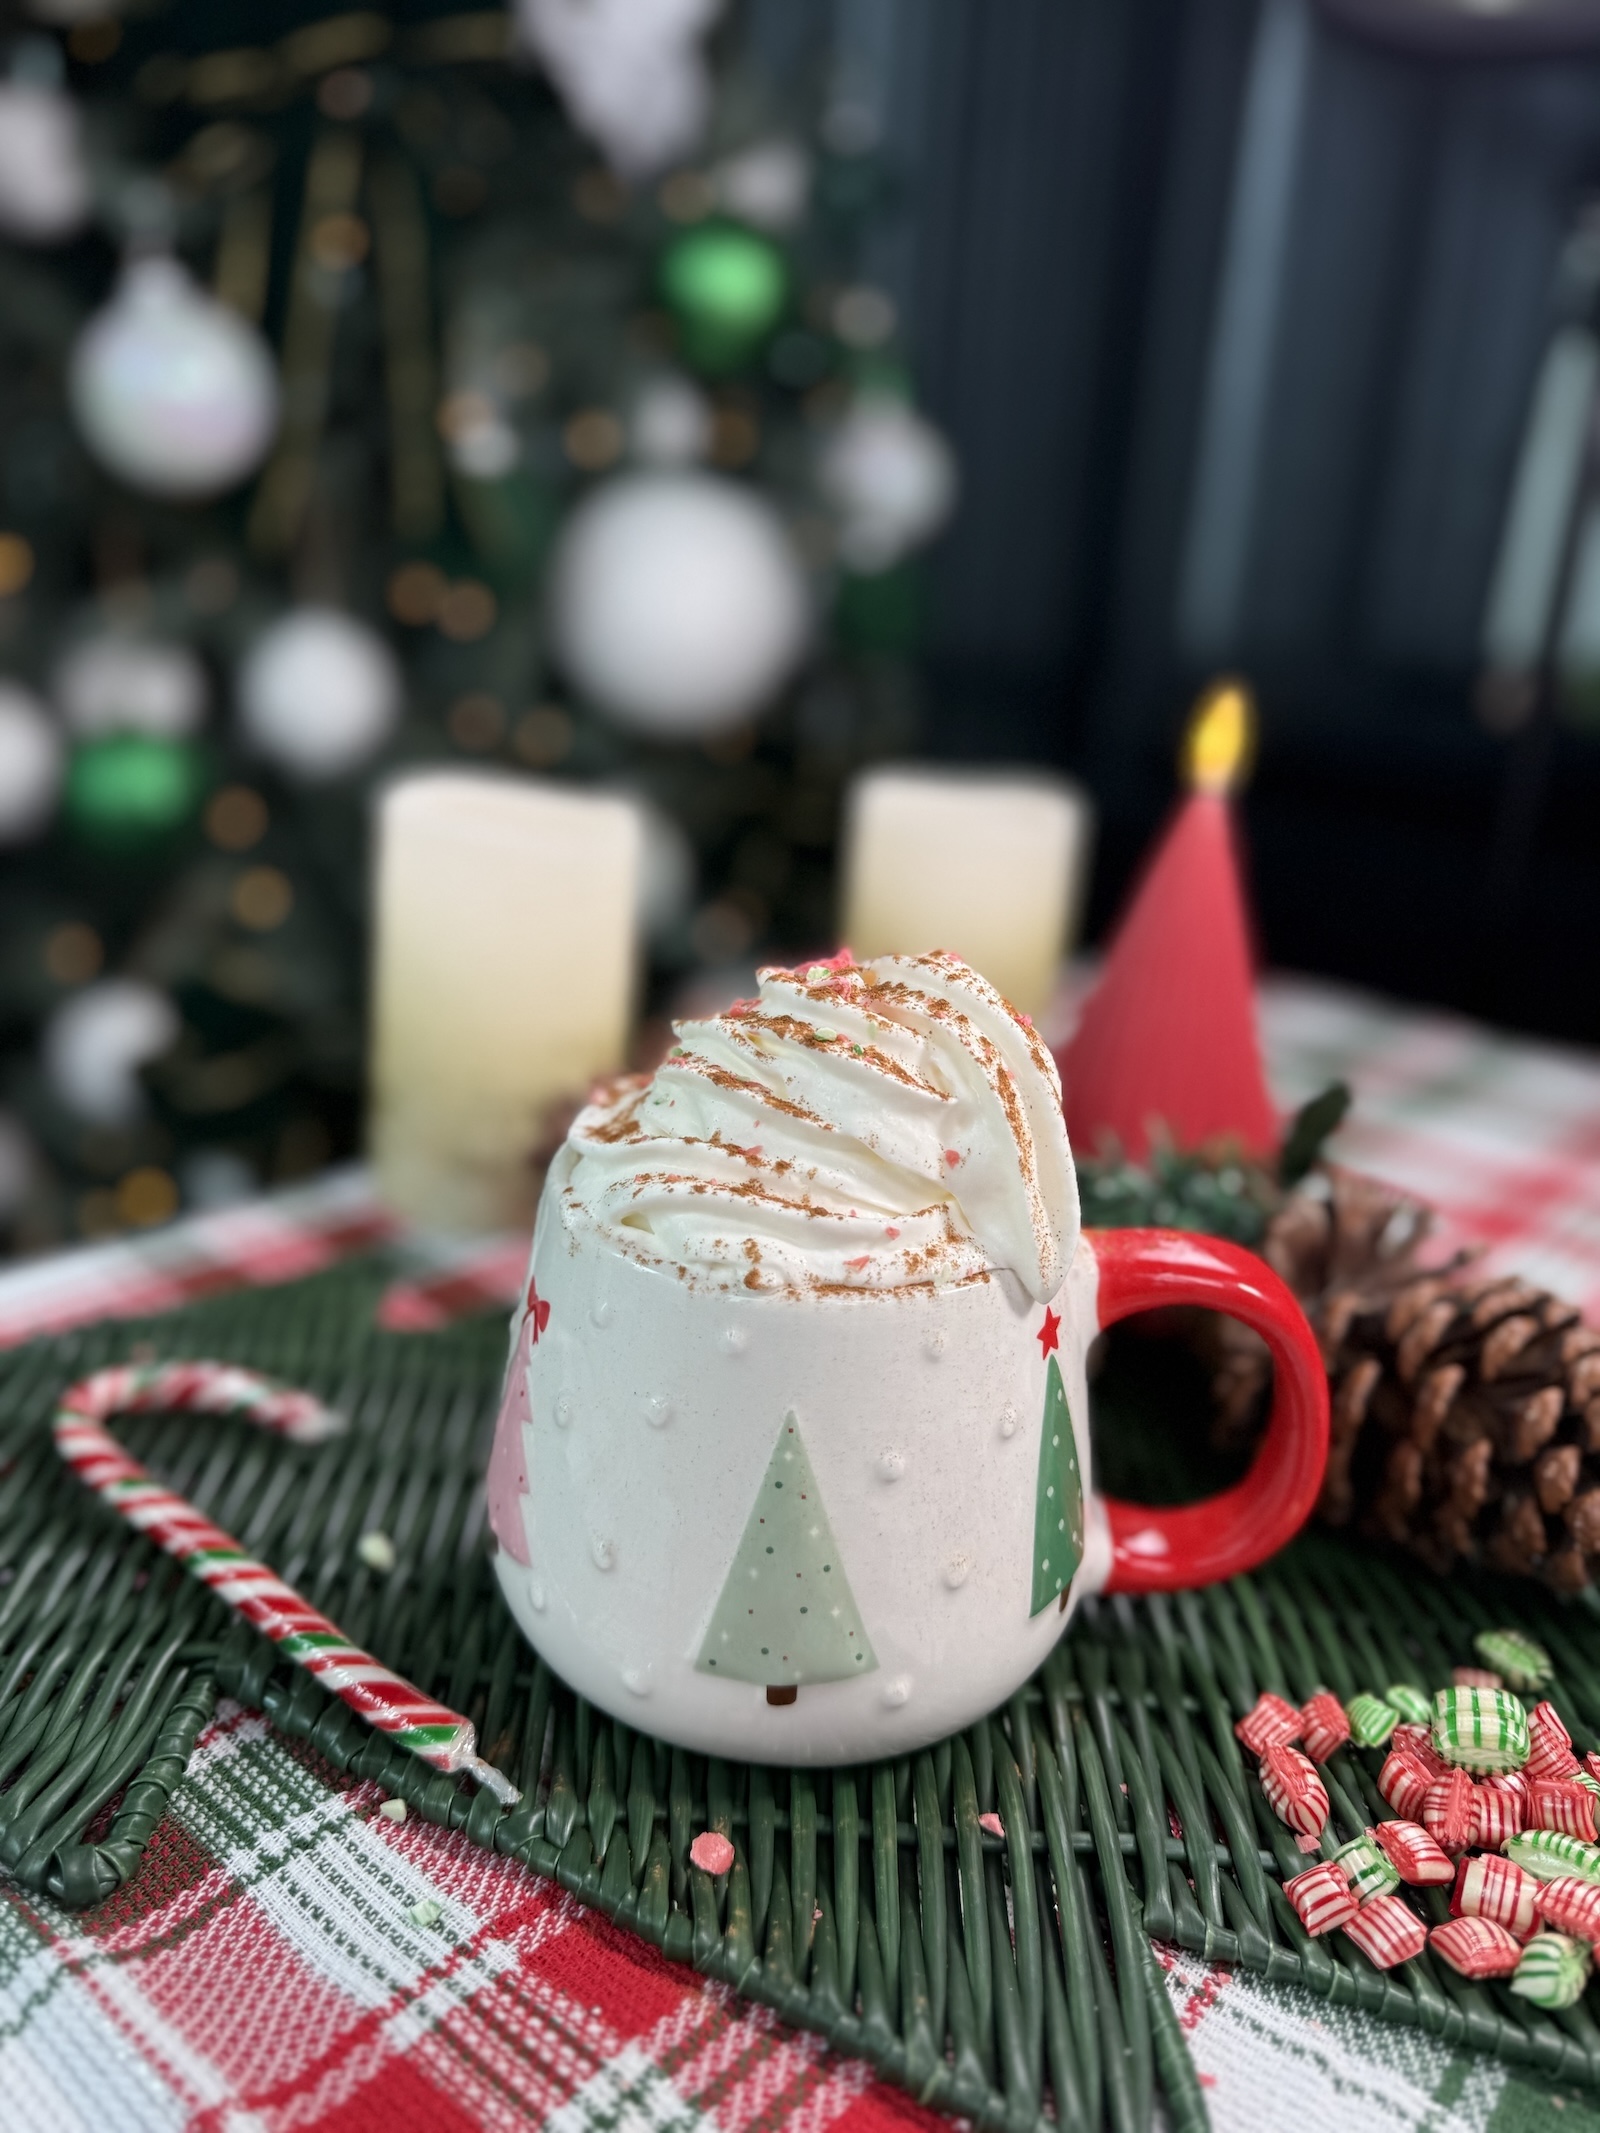
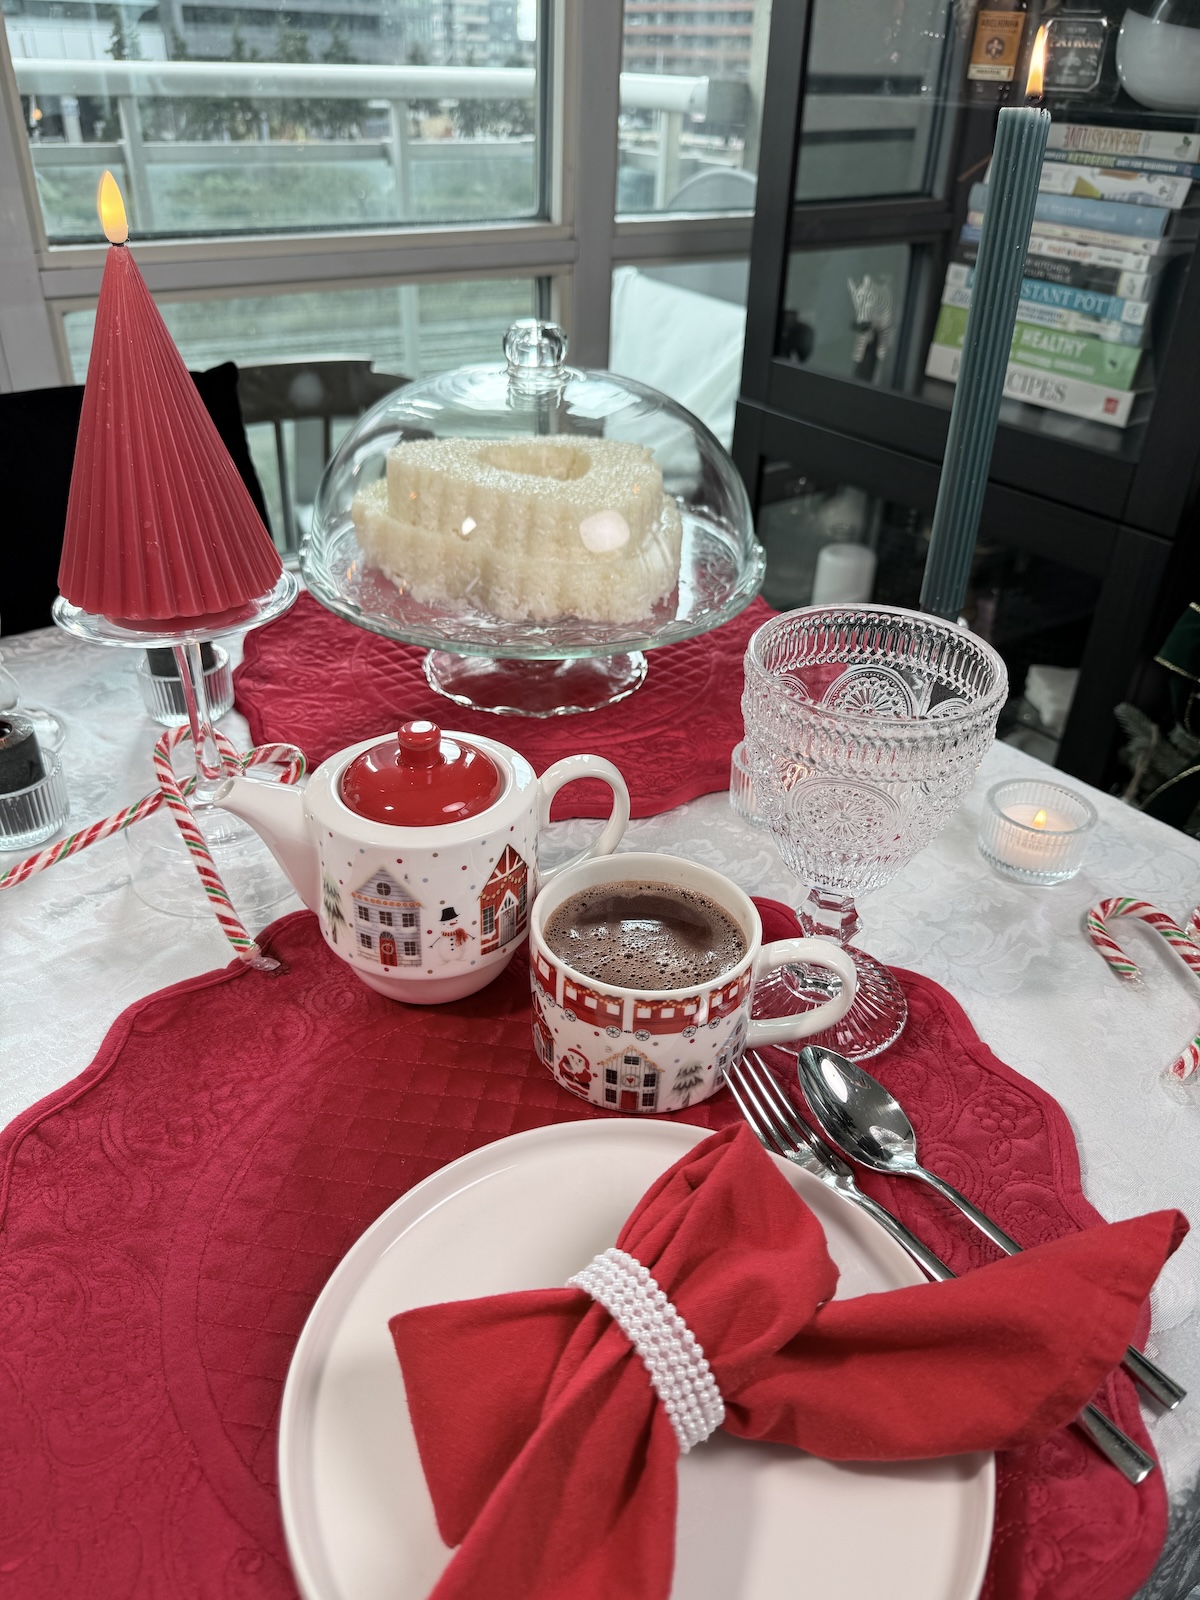
Gluten-Free Peppermint Hot Chocolate
Ingredients (Serves 2)
2 cups milk (or a dairy-free alternative, such as almond, coconut, or oat milk)
2 tbsp gluten-free cocoa powder
2 tbsp sugar (or your preferred sweetener)
1/4 tsp pure peppermint extract
1/4 tsp vanilla extract
Whipped cream (optional, ensure it's gluten-free)
Crushed gluten-free candy canes or chocolate shavings (for garnish)
Instructions
Heat the Milk:
In a small saucepan, heat the milk over medium heat. Stir occasionally to prevent it from scalding.
Make the Chocolate Base:
Whisk in the cocoa powder and sugar until fully dissolved.
Heat until the mixture is warm and well-combined (do not boil).
Add Flavorings:
Remove the saucepan from heat.
Stir in the peppermint and vanilla extracts.
Serve and Garnish:
Pour the hot chocolate into two mugs.
Top with whipped cream and sprinkle with crushed candy canes or chocolate shavings.
Enjoy
Sip and savor the cozy, minty holiday vibes
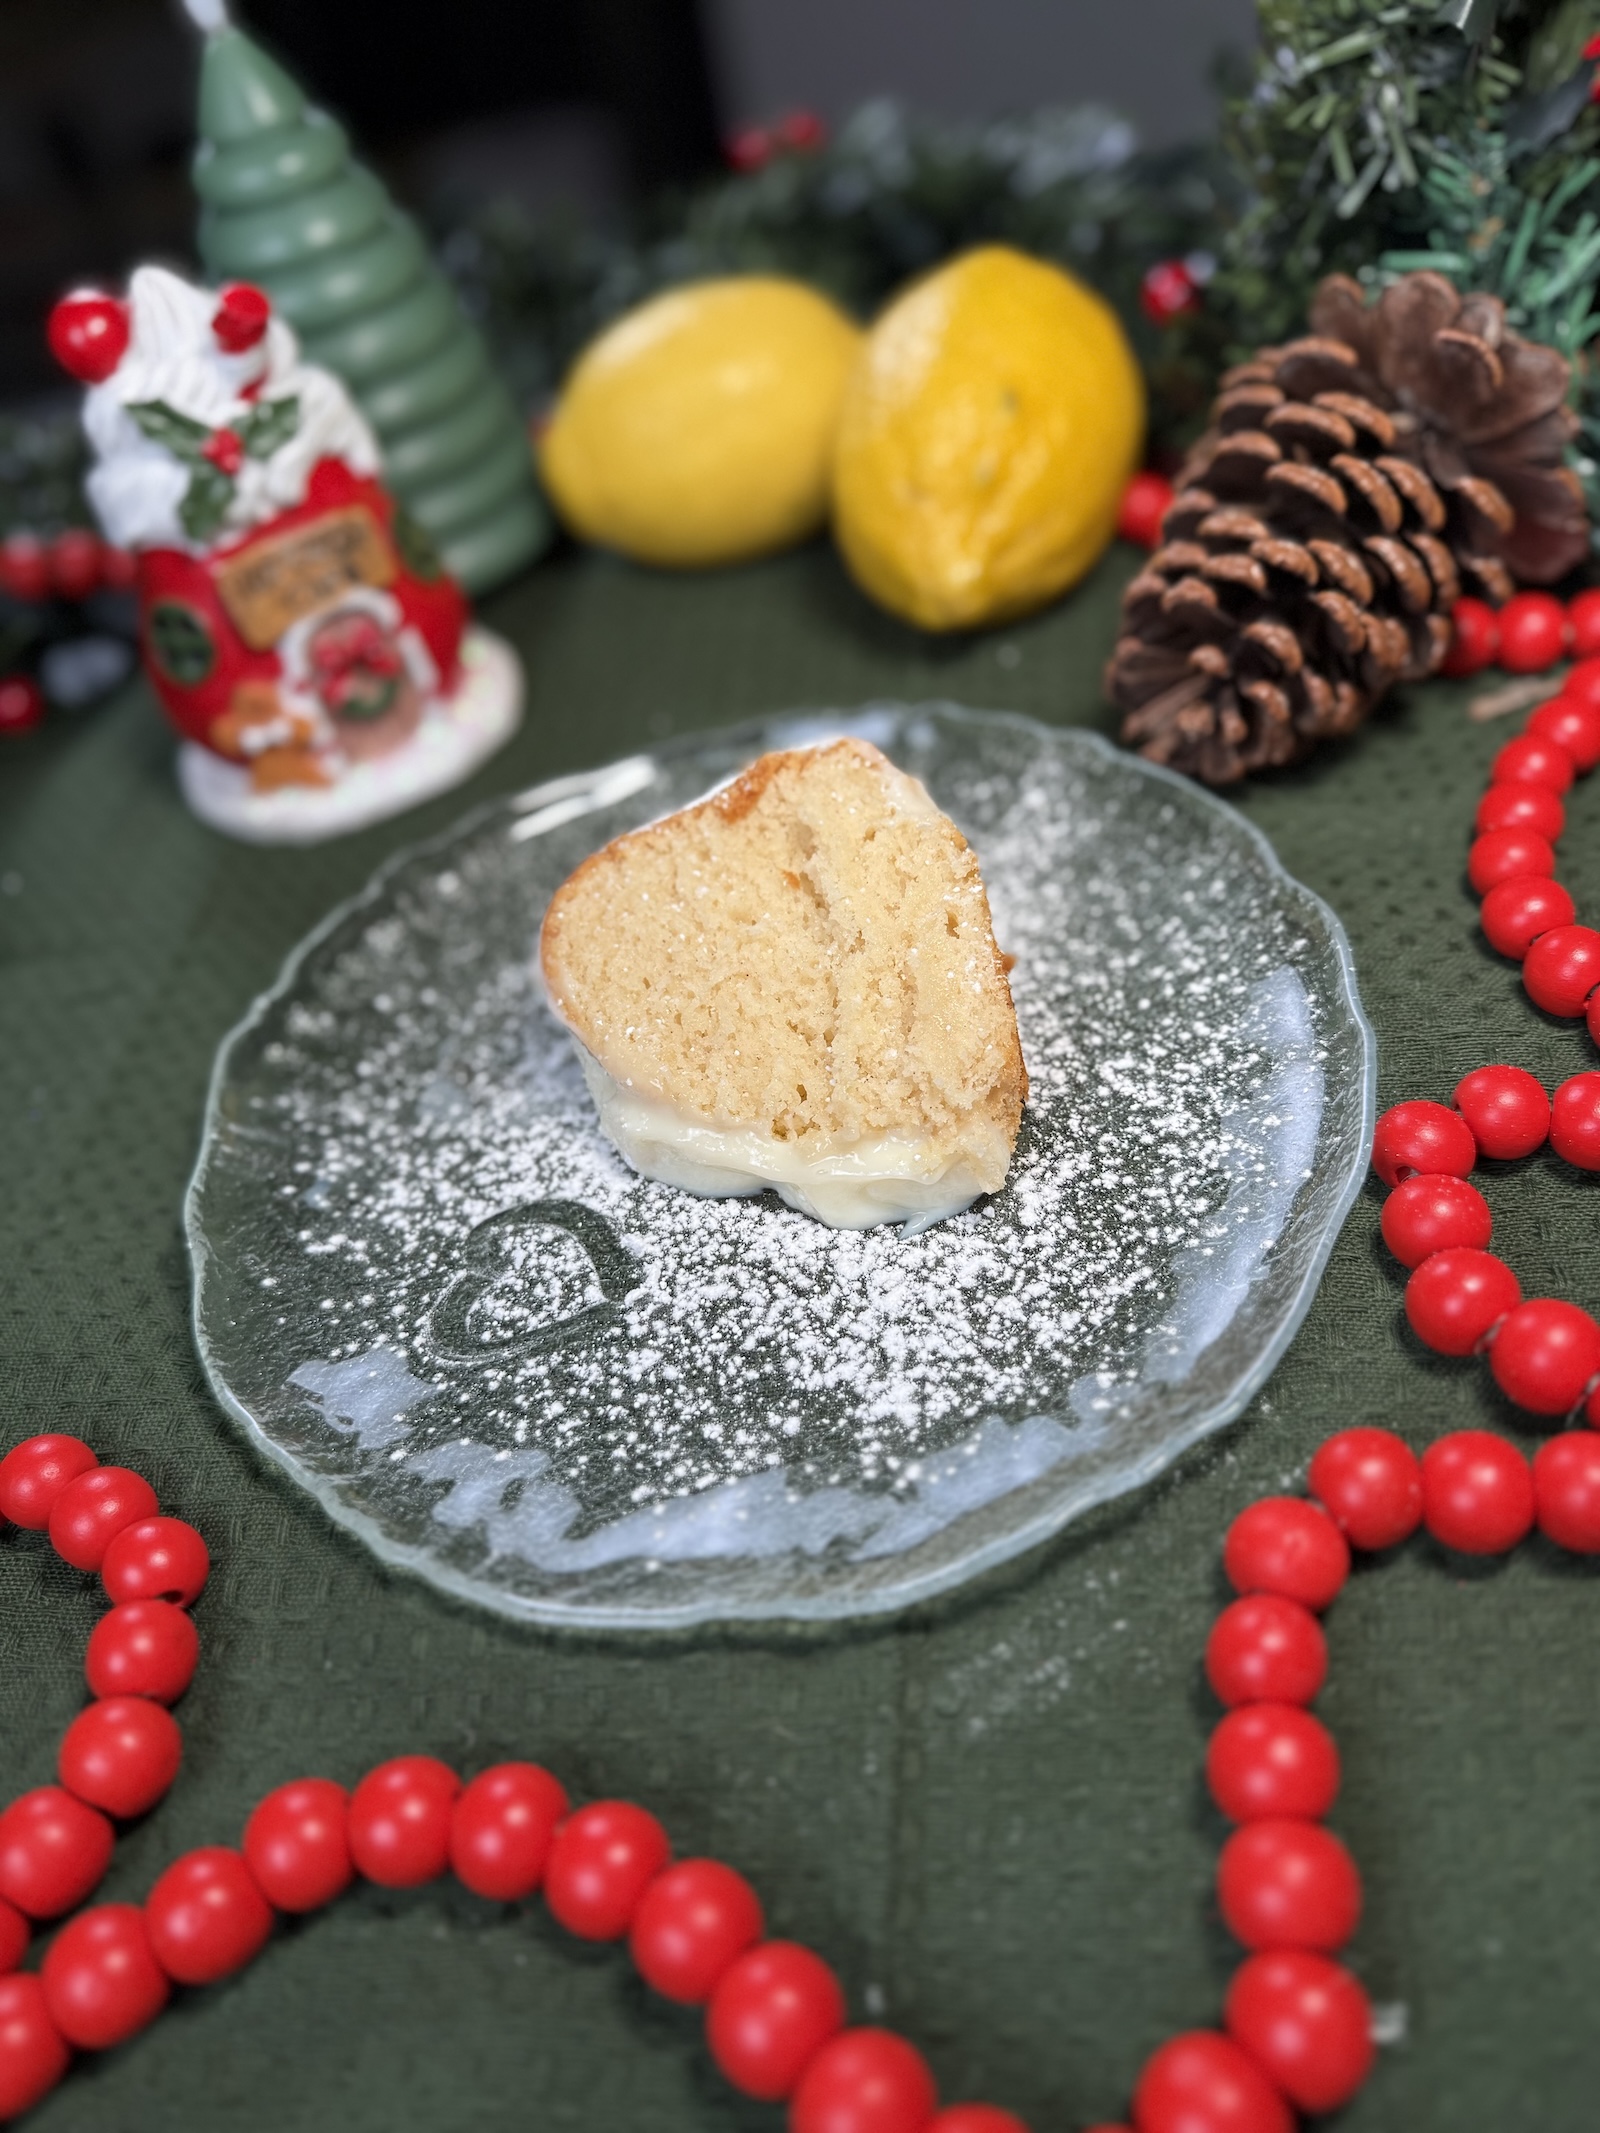
Gluten-free Lemon Cake
Ingredients for the Cake:
2 eggs
2 tablespoons butter
1 cup sugar
1 teaspoon vanilla extract
2 cups gluten-free flour (e.g., Bob’s Red Mill 1-to-1 Baking Flour)
1 ½ cups milk
Juice of 2 lemons
1 tablespoon baking powder
Ingredients for the Topping:
1 ½ cans sweetened condensed milk
Juice of 2 lemons
Preparation
Make the Batter:
In a stand mixer, beat the eggs, butter, sugar, and vanilla extract until the mixture becomes light and creamy.
Gradually add the flour and milk, mixing just until combined. Avoid overmixing.
Add the juice of 2 lemons and gently mix by hand until fully incorporated.
Fold in the baking powder, stirring gently.
Bake the Cake:
Preheat your oven to 350°F (175°C).
Grease a baking pan with butter or cooking spray.
Pour the batter into the prepared pan and bake for 30–40 minutes, or until a toothpick inserted in the center comes out clean.
Prepare the Topping:
In a bowl, gently mix the condensed milk and lemon juice until smooth. The mixture will thicken as it rests.
Refrigerate the topping while the cake bakes and cools.
Assemble the Cake:
Once the cake is fully baked, allow it to cool completely.
Spread the chilled lemon topping over the cooled cake. Do not add the topping to a warm cake, as it will melt.
Enjoy
This lemon cake is light, tangy, and perfectly sweet—great for any occasion.
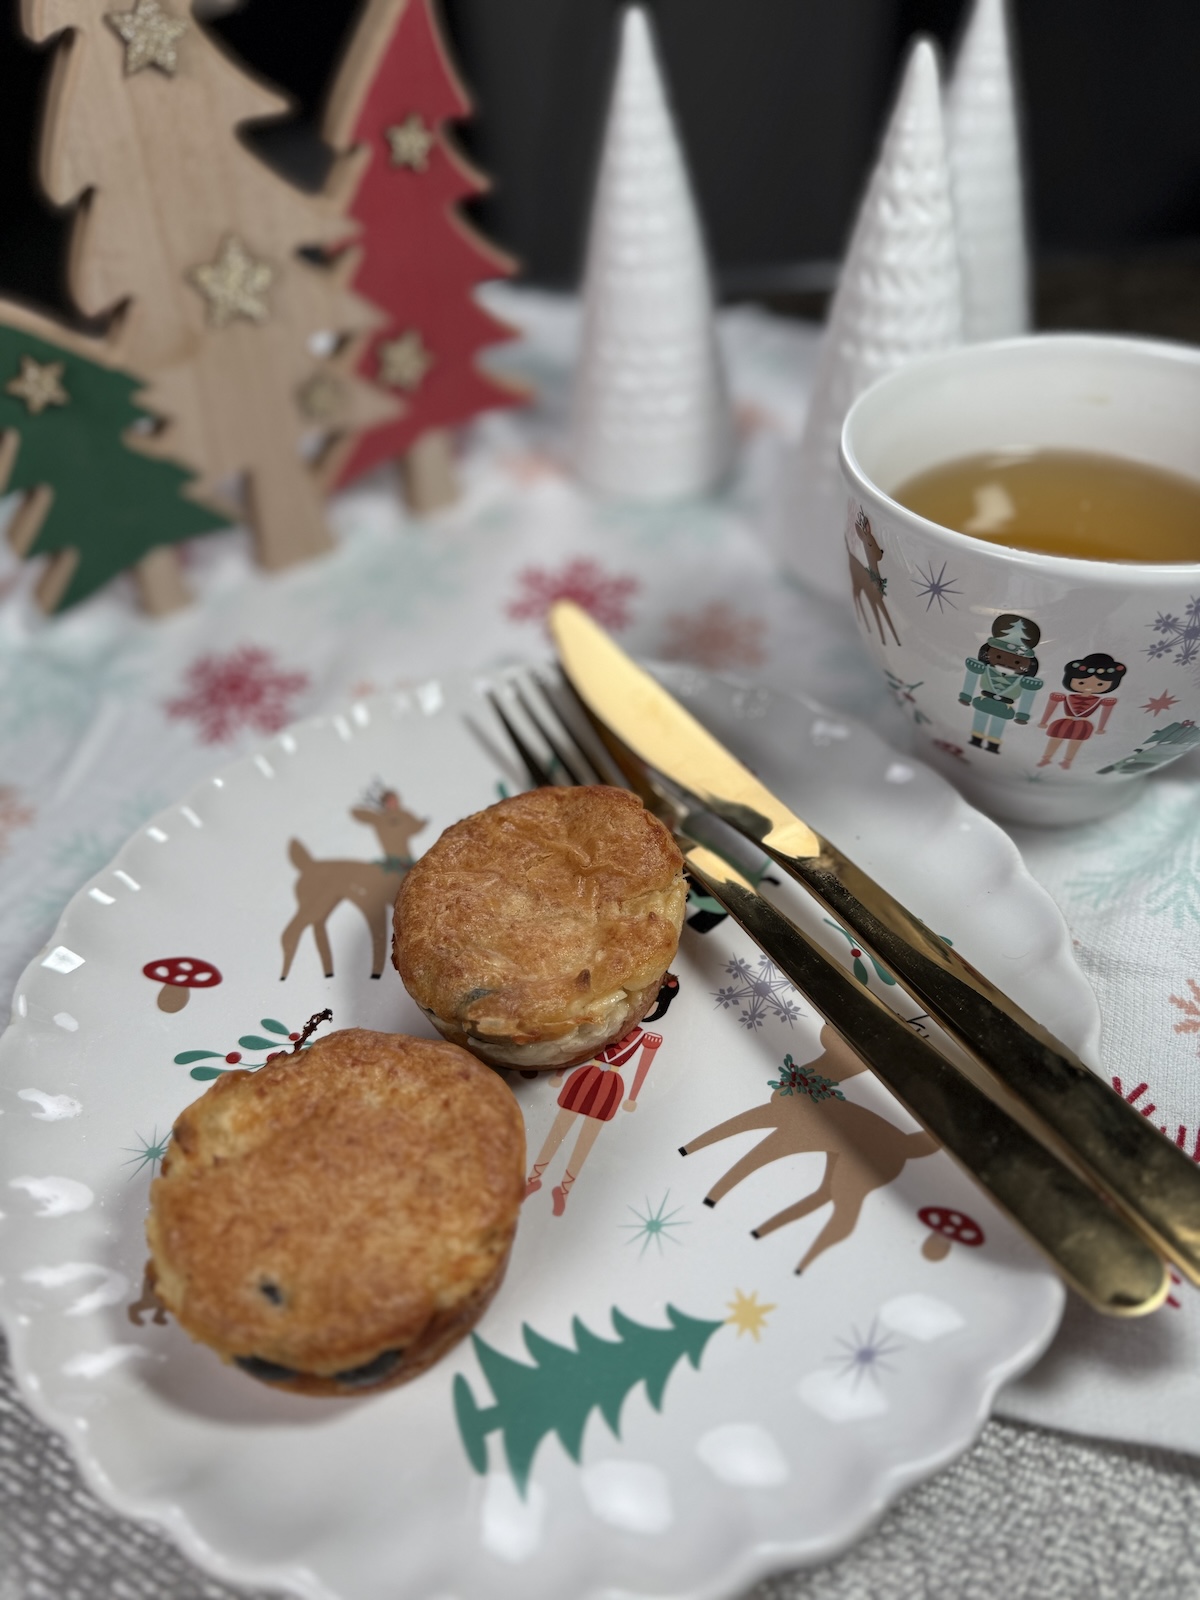
Gluten-Free Mini Pies
Ingredients:
For the Filling:
5 garlic cloves, minced
½ onion, finely chopped
Salt (to taste)
Olive oil
½ cup chopped olives
1 cooked chicken breast (shredded) or 1 can of tuna (drained)
1 cup heavy cream (or enough to create a creamy consistency)
For the Batter:
2 cups milk
1 cup oil
½ cup grated cheese
2 eggs
2 cups gluten-free flour (e.g., Bob’s Red Mill 1-to-1 Baking Flour)
1 teaspoon salt
1 tablespoon gluten-free baking powder
Equipment:
Muffin tin
Preparation:
Preheat the Oven:
Preheat your oven to 350°F (175°C).
Prepare the Filling:
Heat olive oil in a pan over medium heat.
Add garlic and onion, and sauté until golden and fragrant.
Stir in the chicken or tuna, salt, and chopped olives.
Pour in the heavy cream, mixing until the filling achieves a creamy consistency. Remove from heat and set aside.
Prepare the Batter:
In a blender or mixer, combine the milk, oil, grated cheese, eggs, gluten-free flour, and salt. Blend until smooth and well combined.
Add the baking powder and gently mix it into the batter until fully incorporated.
Assemble the Mini Pies:
Grease the muffin tin or line it with paper liners.
Pour a small amount of batter into each cup to cover the bottom.
Add a spoonful of the filling to the center of each cup.
Top with more batter to cover the filling.
Bake:
Place the muffin tin in the preheated oven and bake for approximately 14 minutes, or until the tops are golden and a toothpick inserted into the batter comes out clean.
Serve and Enjoy:
Let the mini pies cool slightly before removing them from the tin. Serve warm for the best flavor.
These savory gluten-free mini pies are perfect for snacks, appetizers, or light meals.
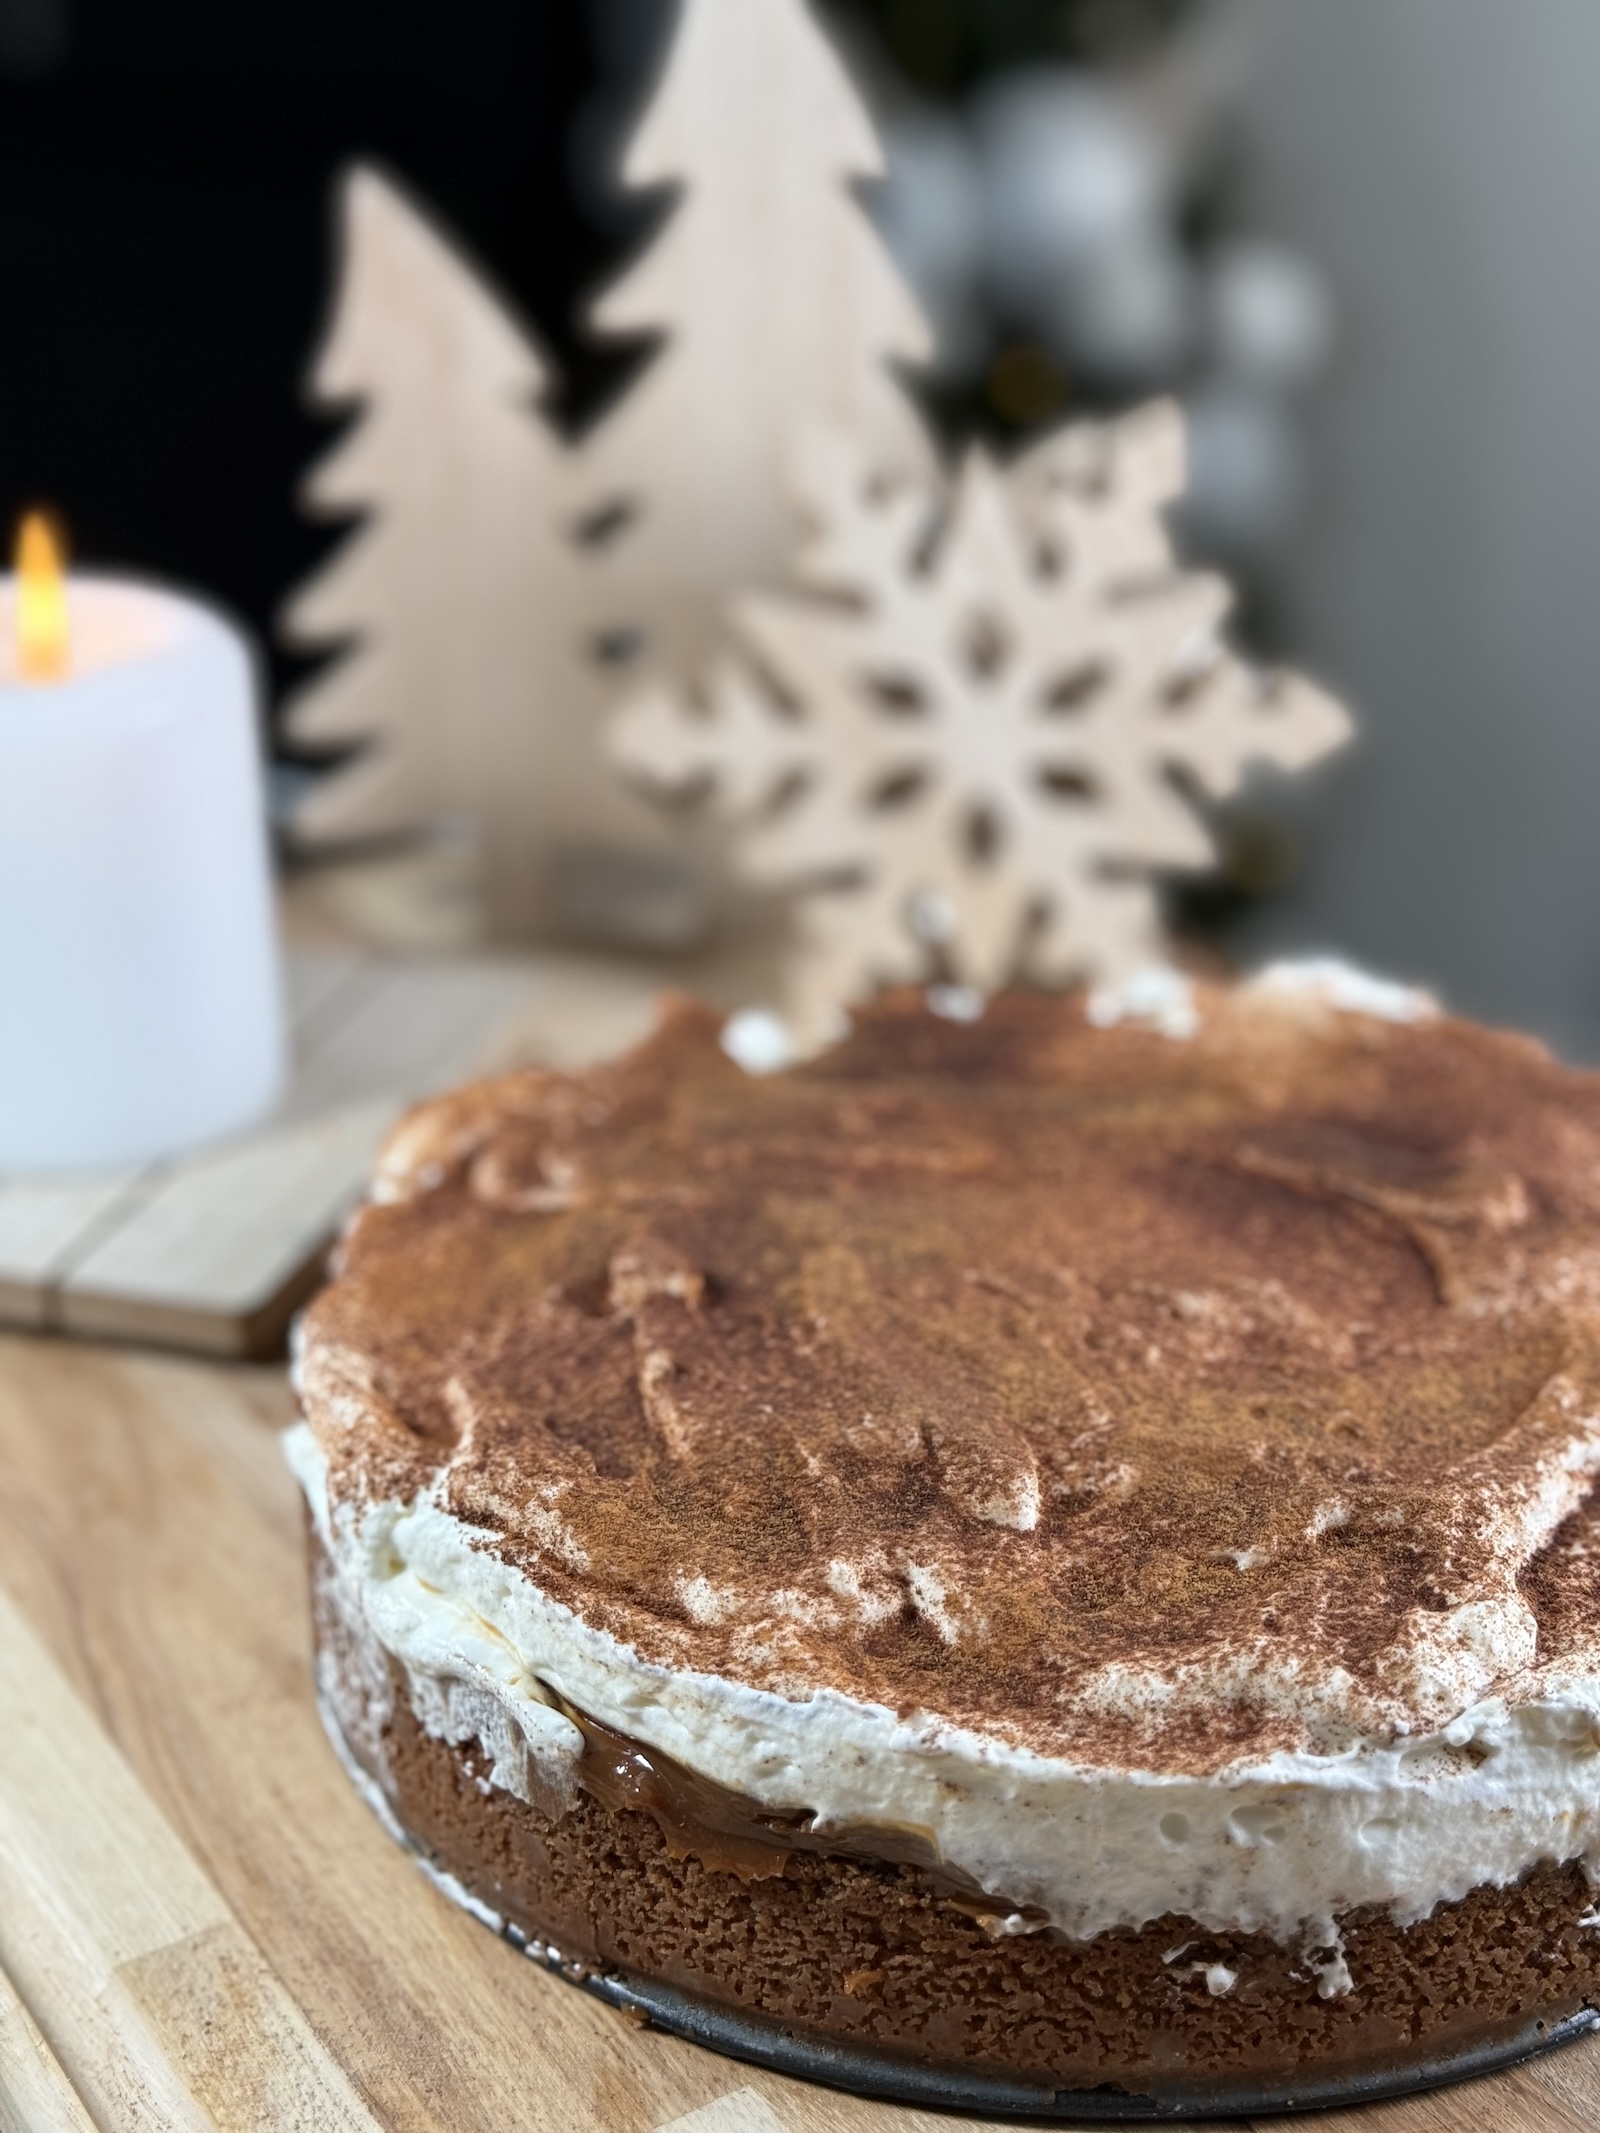
Gluten-Free Banoffee
Ingredients
For the Crust:
175 g (about 1.75 cups) gluten-free graham cracker crumbs
1/4 teaspoon granulated sugar (or coconut sugar for a deeper flavor)
5 tablespoons unsalted butter, melted (or vegan/dairy-free butter)
1/4 teaspoon kosher salt
For the Filling:
450 g heavy whipping cream (35%, very cold)
120 g granulated sugar (about 1/2 cup)
1/2–3/4 cup dulce de leche (adjust to taste)
3–4 bananas, sliced into rounds
For Topping:
2 tablespoons gluten-free cocoa powder (unsweetened)
1 teaspoon ground cinnamon
Instructions
1. Prepare the Crust:
Preheat the oven to 350°F (175°C).
In a medium bowl, combine the gluten-free graham cracker crumbs and sugar.
Pour in the melted butter and salt, mixing until the crumbs are evenly moistened and hold together when pinched. Adjust the texture with more butter or crumbs if needed.
Press the crumb mixture firmly into the bottom of a springform pan, spreading a thin layer slightly up the sides.
Bake for 6 minutes, then cool the crust in the refrigerator until completely cooled before adding the filling.
2. Prepare the Filling:
In a large bowl, beat the whipping cream and sugar with an electric mixer until stiff peaks form. Be careful not to overwhip. Reserve the whipped cream (chantilly) in the fridge.
Slice the bananas into round slices, about 1/4 inch thick.
3. Assemble the Dessert:
Spread a generous layer of dulce de leche over the cooled graham cracker crust.
Arrange the banana slices in an even layer over the dulce de leche.
Cover the bananas with the whipped cream, smoothing it evenly with a spatula.
4. Add the Finishing Touches:
Using a fine sieve, dust the top of the whipped cream with cocoa powder.
Sprinkle with ground cinnamon for a warm, aromatic finish.
5. Chill and Serve:
Cover the dessert and chill in the refrigerator for at least 4 hours, or overnight for the best flavor and texture.
Slice and serve cold.
Tips for Success:
Perfect Whipped Cream: Ensure your cream and mixing bowl are very cold for the best results.
Ripe Bananas: Use bananas that are ripe but firm to avoid mushiness in the dessert.
Gluten-free Espresso Kiss

Ingredients:
1 cup milk (dairy or plant-based, like almond or oat milk)
1/4 cup heavy cream (optional, for creaminess)
3 tablespoons gluten free cocoa powder
2 tablespoons sugar (adjust to taste)
1/2 cup gluten free brewed coffee or 1 shot of espresso
1/4 teaspoon vanilla extract
Whipped cream, chocolate shavings, or cinnamon (optional for garnish)
Instructions:
Prepare the Hot Chocolate Base:
In a small saucepan, combine the milk, heavy cream (if using), cocoa powder, and sugar. Whisk well to dissolve the cocoa and sugar.Heat the Mixture:
Place the saucepan over medium heat, stirring constantly, until the mixture is hot but not boiling.Add the Coffee:
Once the hot chocolate base is ready, stir in the brewed coffee or espresso. Mix until fully combined.Enhance the Flavor:
Stir in the vanilla extract for a subtle, aromatic touch.Serve and Garnish:
Pour the hot chocolate and coffee mixture into a mug. Top with whipped cream, chocolate shavings, or a sprinkle of cinnamon for a festive touch.
Tips:
For extra indulgence, add a tablespoon of Nutella or a pinch of sea salt to the hot chocolate base.
Adjust the coffee-to-chocolate ratio based on your preference for a stronger or milder coffee flavor.
Make it dairy-free by using plant-based milk and coconut cream for topping.
Enjoy your cozy and energizing hot chocolate coffee!
Gluten-Free Coconut Cold Cake
Ingredients:
500 g granulated tapioca
2 cups sugar
1 liter hot milk
200 g grated coconut
1 can coconut milk (200 ml)
1 can condensed milk
Preparation Method:
Combine Tapioca and Sugar:
In a large mixing bowl, combine the granulated tapioca and sugar.Hydrate the Tapioca:
Gradually add the hot milk to the tapioca mixture, stirring continuously to allow the tapioca to hydrate. As the mixture thickens, continue adding the remaining hot milk little by little, stirring each time until it reaches a creamy consistency. Cover and let it rest, repeating the process as needed until all the hot milk is absorbed and the tapioca is fully hydrated.Add Coconut Mixture:
Once the tapioca is creamy and fully hydrated, stir in the grated coconut and coconut milk until well incorporated.Prepare the Mold:
Grease a mold or a serving dish with a layer of condensed milk. Pour in the hydrated tapioca mixture, spreading it evenly. Drizzle the remaining condensed milk over the top for a glossy, sweet finish.Rest and Chill:
Cover the mold and let it rest at room temperature for 1 to 2 hours. Then transfer it to the refrigerator and chill for at least 2 hours.Unmold and Serve:
Carefully remove the cake from the mold by flipping it onto a serving plate. Slice and serve chilled.
Tips for Serving:
Garnish with additional grated coconut or a sprinkle of toasted coconut for extra flavor and texture.
Serve with fresh fruit berries, for a Christmas color twist.
This cake is perfect for any occasion, offering a creamy, refreshing treat that's naturally gluten-free!
Gluten-Free Cinnamon Cake
Ingredients
For the Cake:
3 large eggs (separated)
1/2 cup melted butter (slightly cooled for better texture)
1 cup milk (room temperature; you can substitute with almond or coconut milk for extra flavor)
1 cup sugar (light brown sugar works well for a richer flavor)
2 cups gluten-free all-purpose flour (Bob’s Red Mill 1-to-1 or similar)
1 tablespoon ground cinnamon (increase to 1.5 tablespoons for a bolder flavor)
1 tablespoon baking powder
1/2 teaspoon salt (to enhance flavor)
For the Topping:
1/2 cup caramel sauce or dulce de leche (slightly warmed for easy spreading)
1/4 cup whipped cream
Icing sugar (for dusting)
Cinnamon (optional, for extra garnish)
Preparation
1. Prepare the Oven and Pan:
Preheat your oven to 180°C (350°F). Grease and lightly flour a baking pan with gluten-free flour, or line it with parchment paper for easy removal.
2. Whip the Egg Whites:
In a clean, dry bowl, beat the egg whites until stiff peaks form. Set aside. This will give your cake a fluffy, light texture.
3. Mix the Wet Ingredients:
In a separate bowl, whisk the egg yolks with the sugar until pale and creamy. Add the melted butter and mix until fully incorporated. Gradually add the milk, mixing well after each addition.
4. Combine the Dry Ingredients:
In another bowl, sift together the gluten-free flour, cinnamon, baking powder, and salt. Sifting ensures a smooth, lump-free batter and helps with even rising.
5. Combine Wet and Dry Mixtures:
Gradually add the dry ingredients to the wet ingredients, mixing just until combined. Overmixing can make the cake dense.
6. Fold in the Egg Whites:
Using a spatula, gently fold the beaten egg whites into the batter in three additions. Be careful not to deflate the batter—this step ensures a fluffy cake.
7. Bake the Cake:
Pour the batter into the prepared pan and smooth the top with a spatula. Bake for 30–40 minutes, or until the top is golden brown and a toothpick inserted in the center comes out clean.
8. Cool Completely:
Allow the cake to cool in the pan for 10 minutes, then transfer it to a wire rack to cool completely before adding the topping.
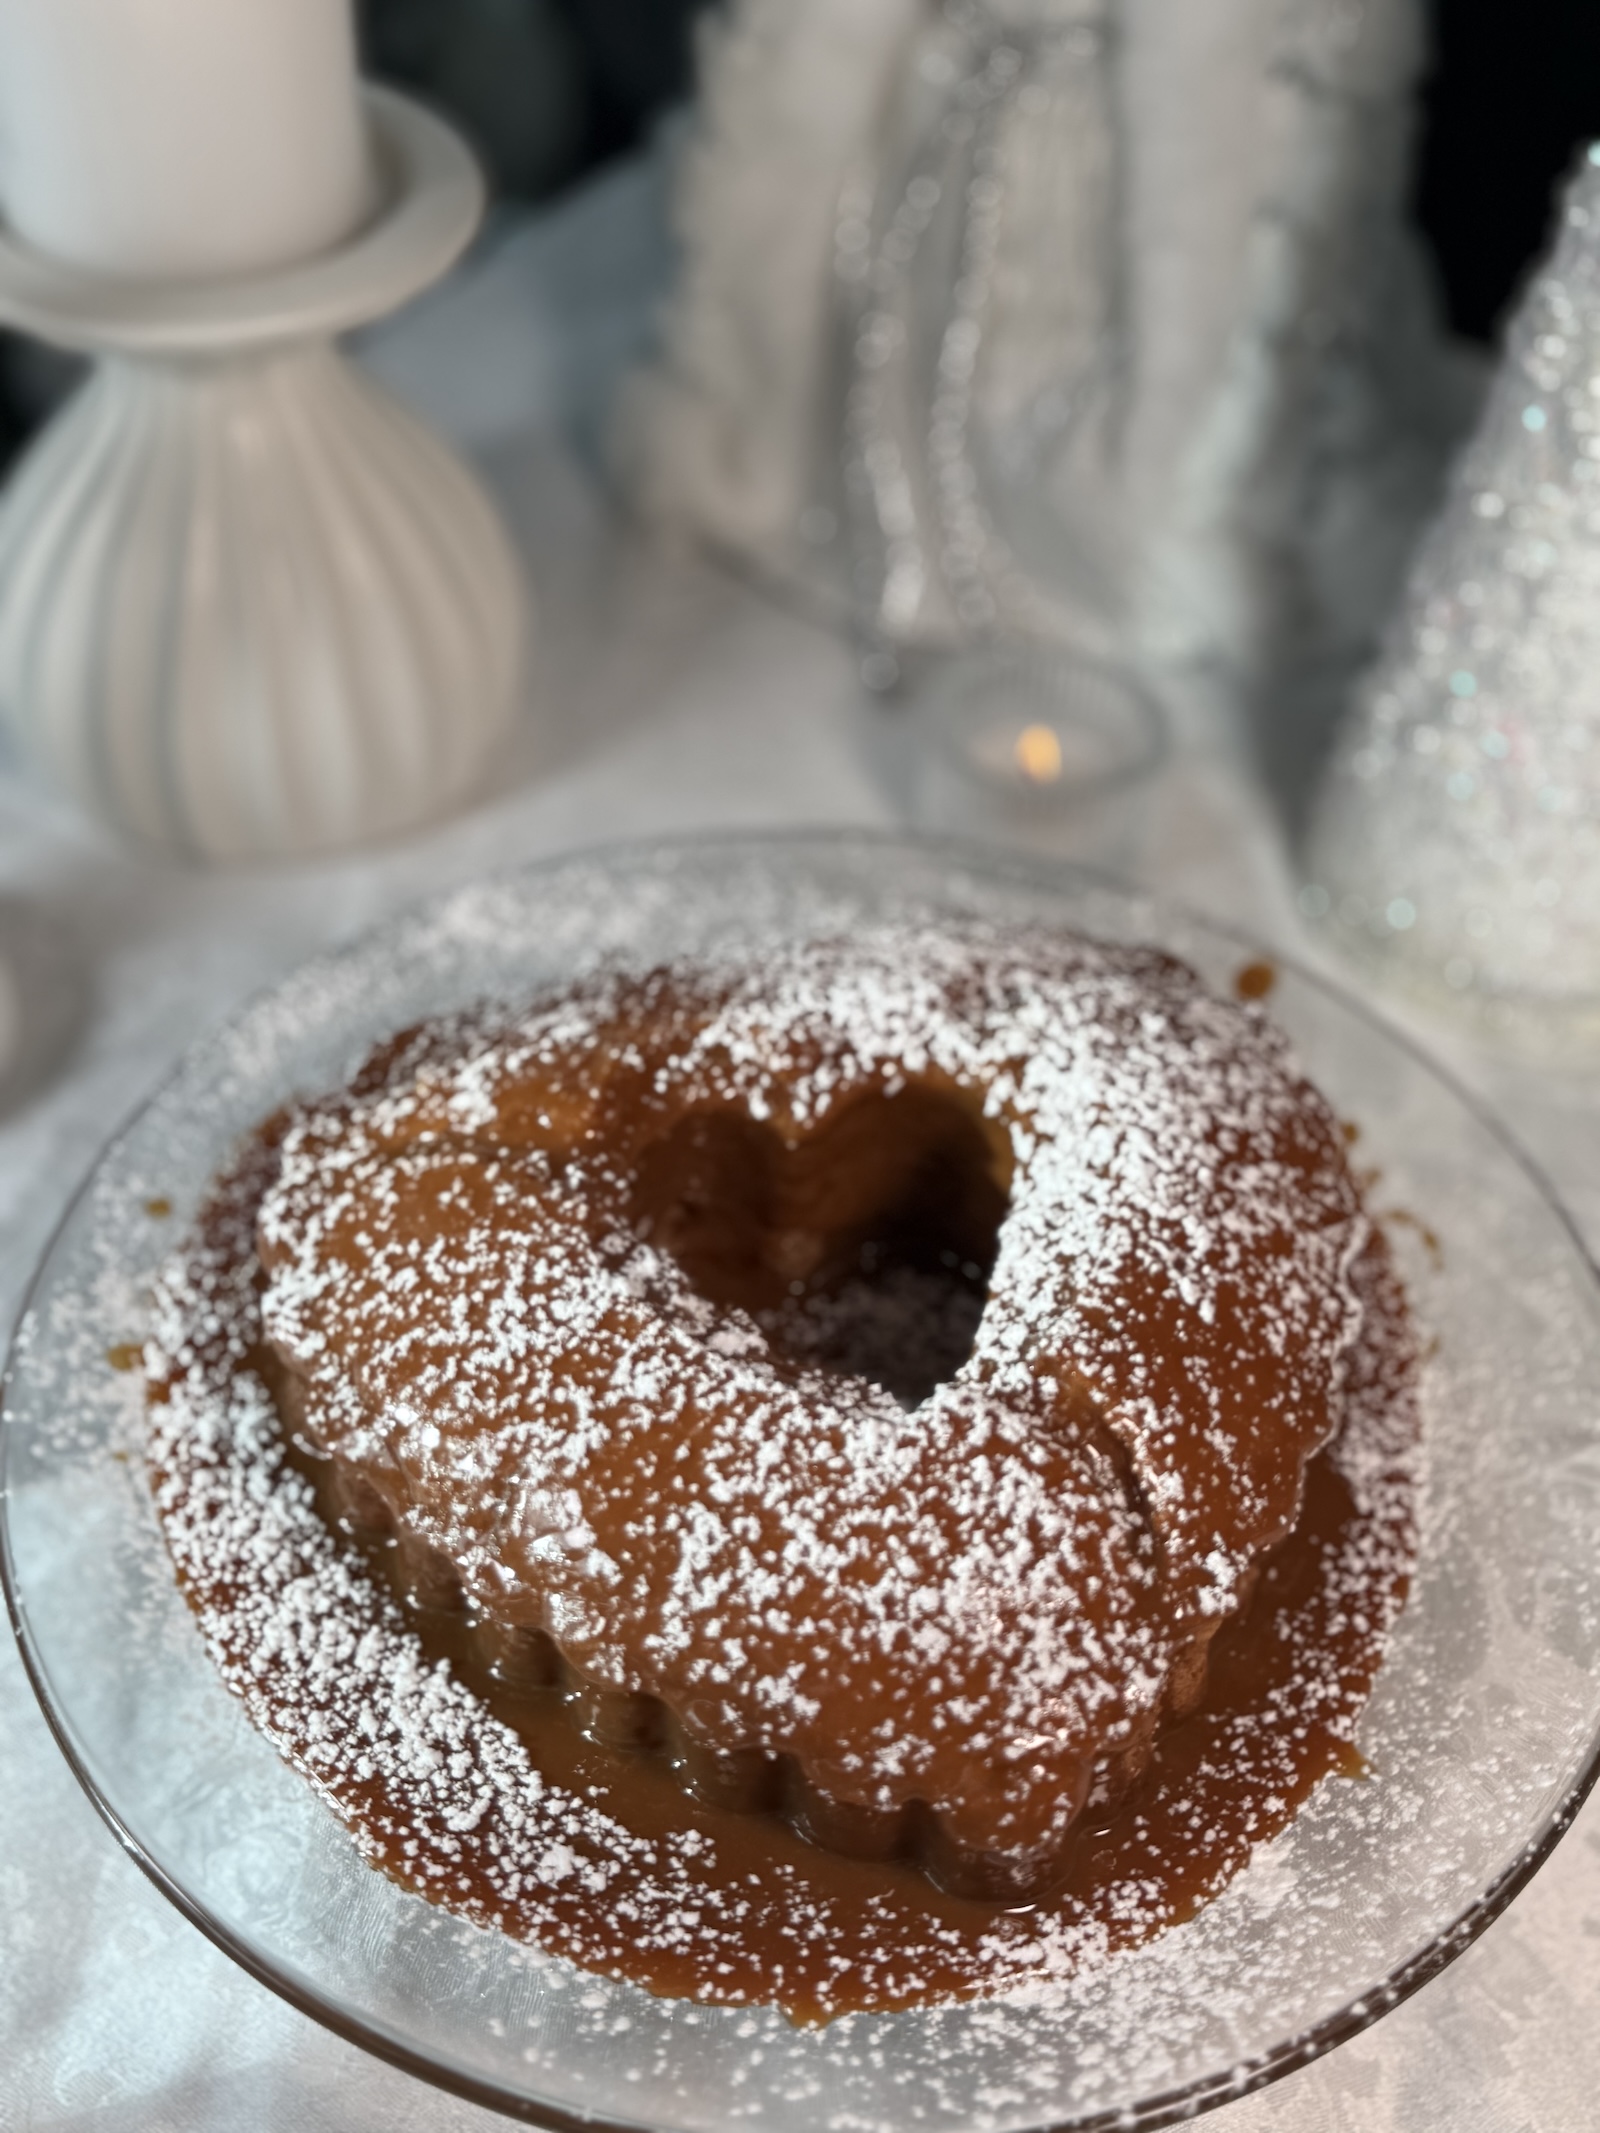
Topping
1. Prepare the Topping:
In a small bowl, mix the warmed caramel sauce or dulce de leche with the whipped cream until smooth and spreadable.
2. Decorate the Cake:
Spread the topping evenly over the cooled cake, ensuring it covers the entire surface.
3. Add the Finishing Touches:
Lightly dust the cake with icing sugar and sprinkle with a pinch of ground cinnamon for an elegant and flavorful finish.
Tips for Extra Flavor and Presentation:
For a stronger cinnamon flavor: Add 1/2 teaspoon of cinnamon to the whipped cream topping.
Texture boost: Stir in 1/4 cup of finely chopped nuts (like pecans or walnuts) or raisins to the batter for added texture.
Moisture enhancement: Brush the baked cake with a little milk or simple syrup before adding the topping.
Presentation: Garnish with a drizzle of caramel sauce and whole cinnamon sticks for a stunning look.
Enjoy your Gluten-Free Cinnamon Cake—a perfect treat for any occasion!
Gluten-Free Corn Cake
Ingredients:
1 cup coarse cornmeal
1/3 cup sugar (choose your preferred type: white, brown, or coconut sugar)
1/4 teaspoon salt
1/4 cup water (or just enough to moisten the mixture)
Instructions:
Hydrate the Cornmeal:
In a mixing bowl, combine the coarse cornmeal and water. Stir until the mixture is evenly moistened, then let it sit for 10 minutes to allow the cornmeal to absorb the liquid.Add Sweetness and Flavor:
After resting, mix in the sugar and salt. Stir well to ensure all the ingredients are evenly distributed, then let the mixture sit for an additional 5 minutes.Prepare for Cooking:
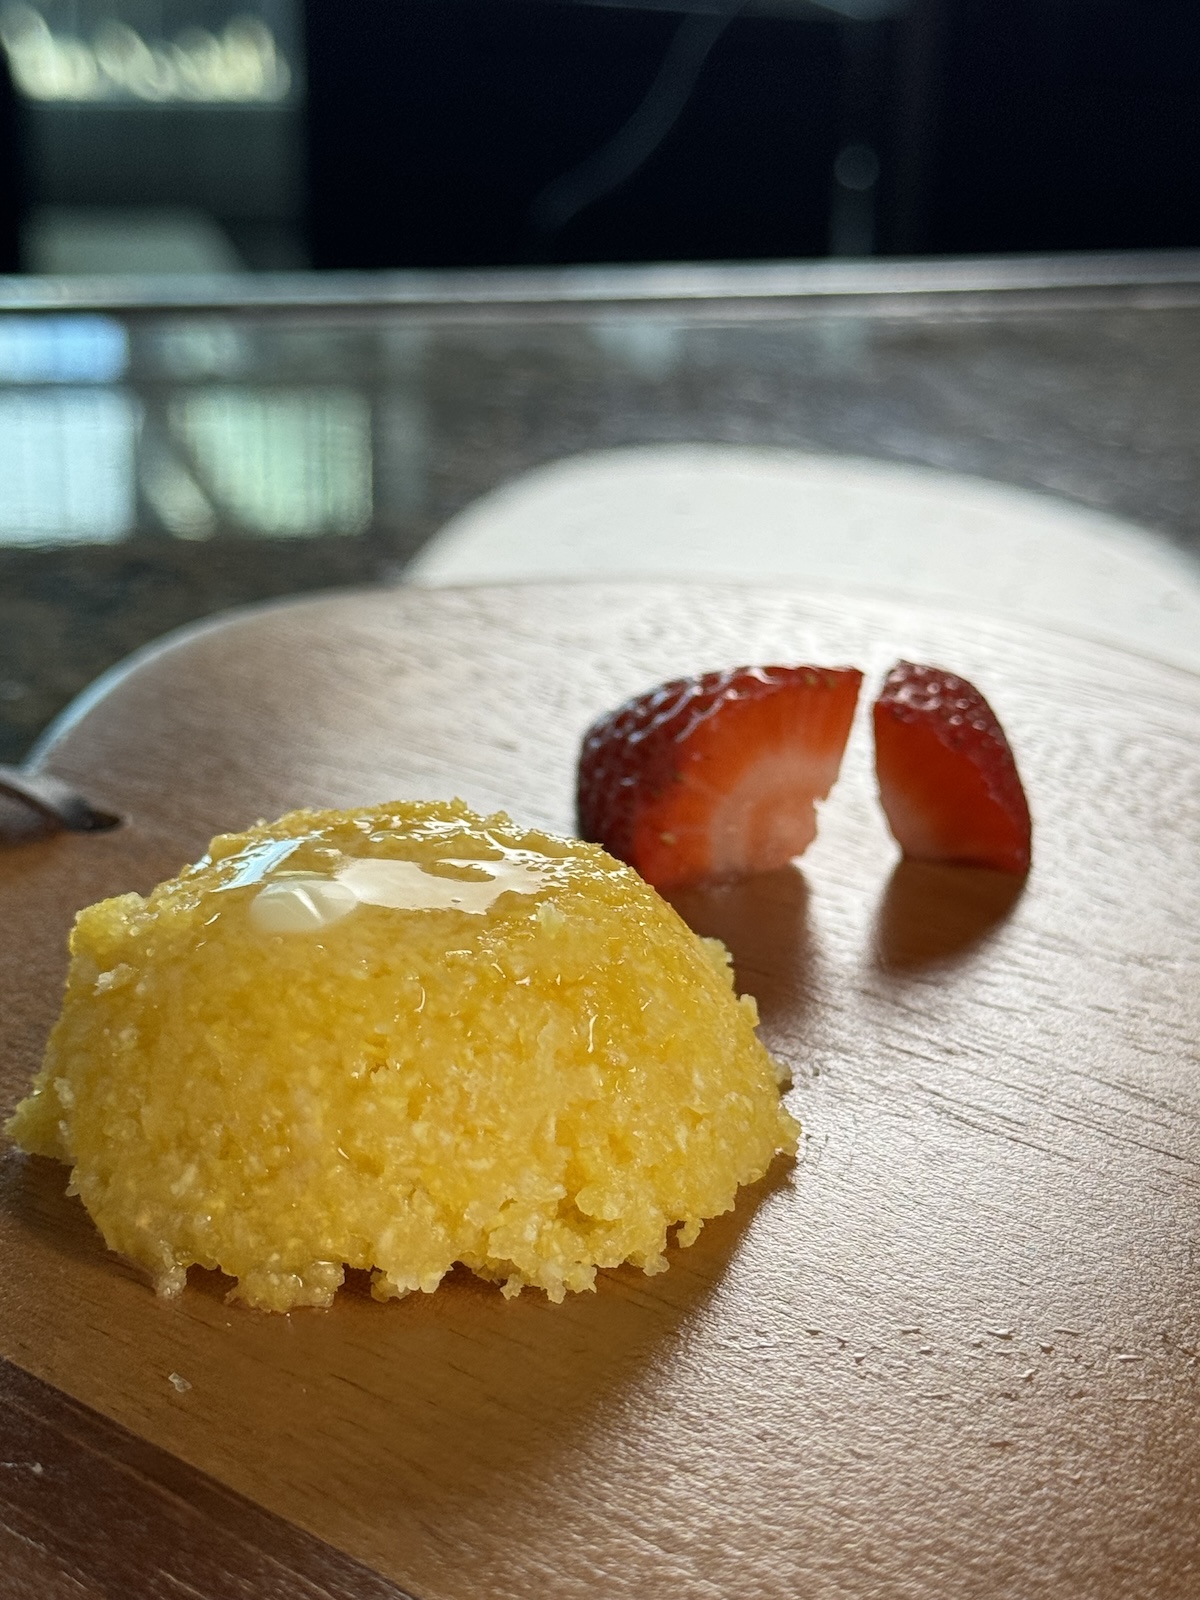
Transfer the mixture to a small microwave-safe glass dish or ramekin, pressing it down gently to level the surface.Cook the Cake:
Microwave the mixture on high for 1 minute. Check the consistency; if needed, microwave for an additional 15-30 seconds until firm and cooked through.Serve Warm:
Enjoy the corn cake while it's warm! Top with a dollop of butter, a drizzle of honey, or your favorite jam for an extra touch of flavor.
Tips:
For a richer flavor, substitute water with milk or coconut milk.
Add a pinch of cinnamon or a few drops of vanilla extract for a delightful twist.
Double the recipe to make more servings or experiment with individual ramekins for a perfect single-serve treat.
Gluten-Free Ladyfingers Cookie and Cream Dessert
Ingredients:
120 g sugar
437 ml lactose-free whipping cream (or regular whipping cream)
1/2 cup condensed milk
1 1/2 cups milk (any type: dairy or plant-based)
200 g gluten-free ladyfingers cookies
Optional: fresh fruit, chocolate shavings, or crushed nuts for garnish
Preparation:
Chill the Equipment:
Chill the mixing bowl and beaters in the refrigerator for about 15 minutes to help whip the cream faster.Make the Chantilly Cream:
In the chilled bowl, combine the whipping cream and sugar. Beat on medium-high speed for about 5–7 minutes, or until stiff peaks form. Set aside in the refrigerator.Prepare the Milk Mixture:
In a separate bowl, mix the milk and condensed milk until fully combined. This will be used to soak the cookies.Layer the Dessert:
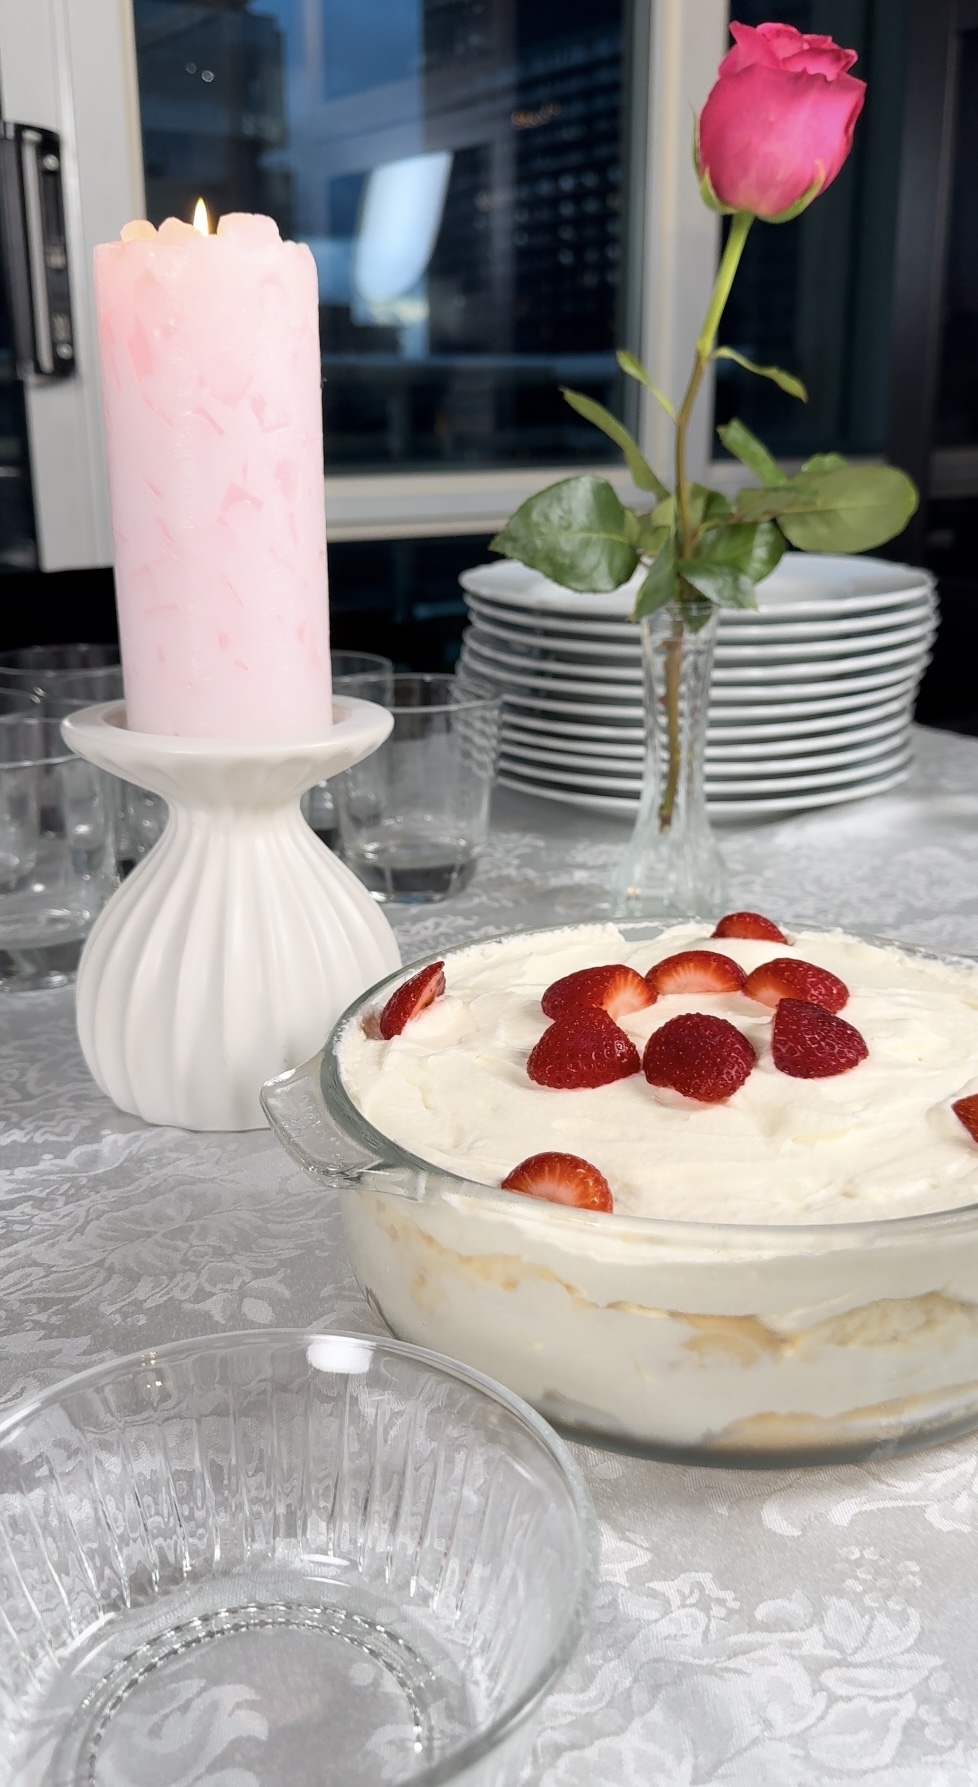
Quickly dip the gluten-free ladyfingers into the milk mixture, ensuring they are moistened but not soggy.
Arrange a layer of cookies in the serving dish, covering the base completely.
Spread a generous layer of the whipped Chantilly cream over the cookies, smoothing it evenly.
Repeat the Layers:
Add another layer of soaked cookies and top it with the remaining Chantilly cream. Smooth the surface for a clean finish.Chill:
Cover the dish with plastic wrap and refrigerate for at least 4 hours, or overnight for the best texture and flavor.Add the Garnish:
Before serving, garnish the dessert with your choice of toppings—fresh fruit (like strawberries or raspberries), chocolate shavings, or crushed nuts work beautifully.Serve and Enjoy:
Slice into portions and serve chilled. Watch it disappear in minutes!
Tips for Success:
Soak Quickly: Don’t let the cookies soak for too long, or they may become mushy.
Make Ahead: This dessert is even better when prepared the day before serving, as the flavors meld together overnight.
Customize: Swap out the milk mixture for a coffee or chocolate-based soak for a different flavor profile.
Gluten - Free Chocolate Chip Banana Cake
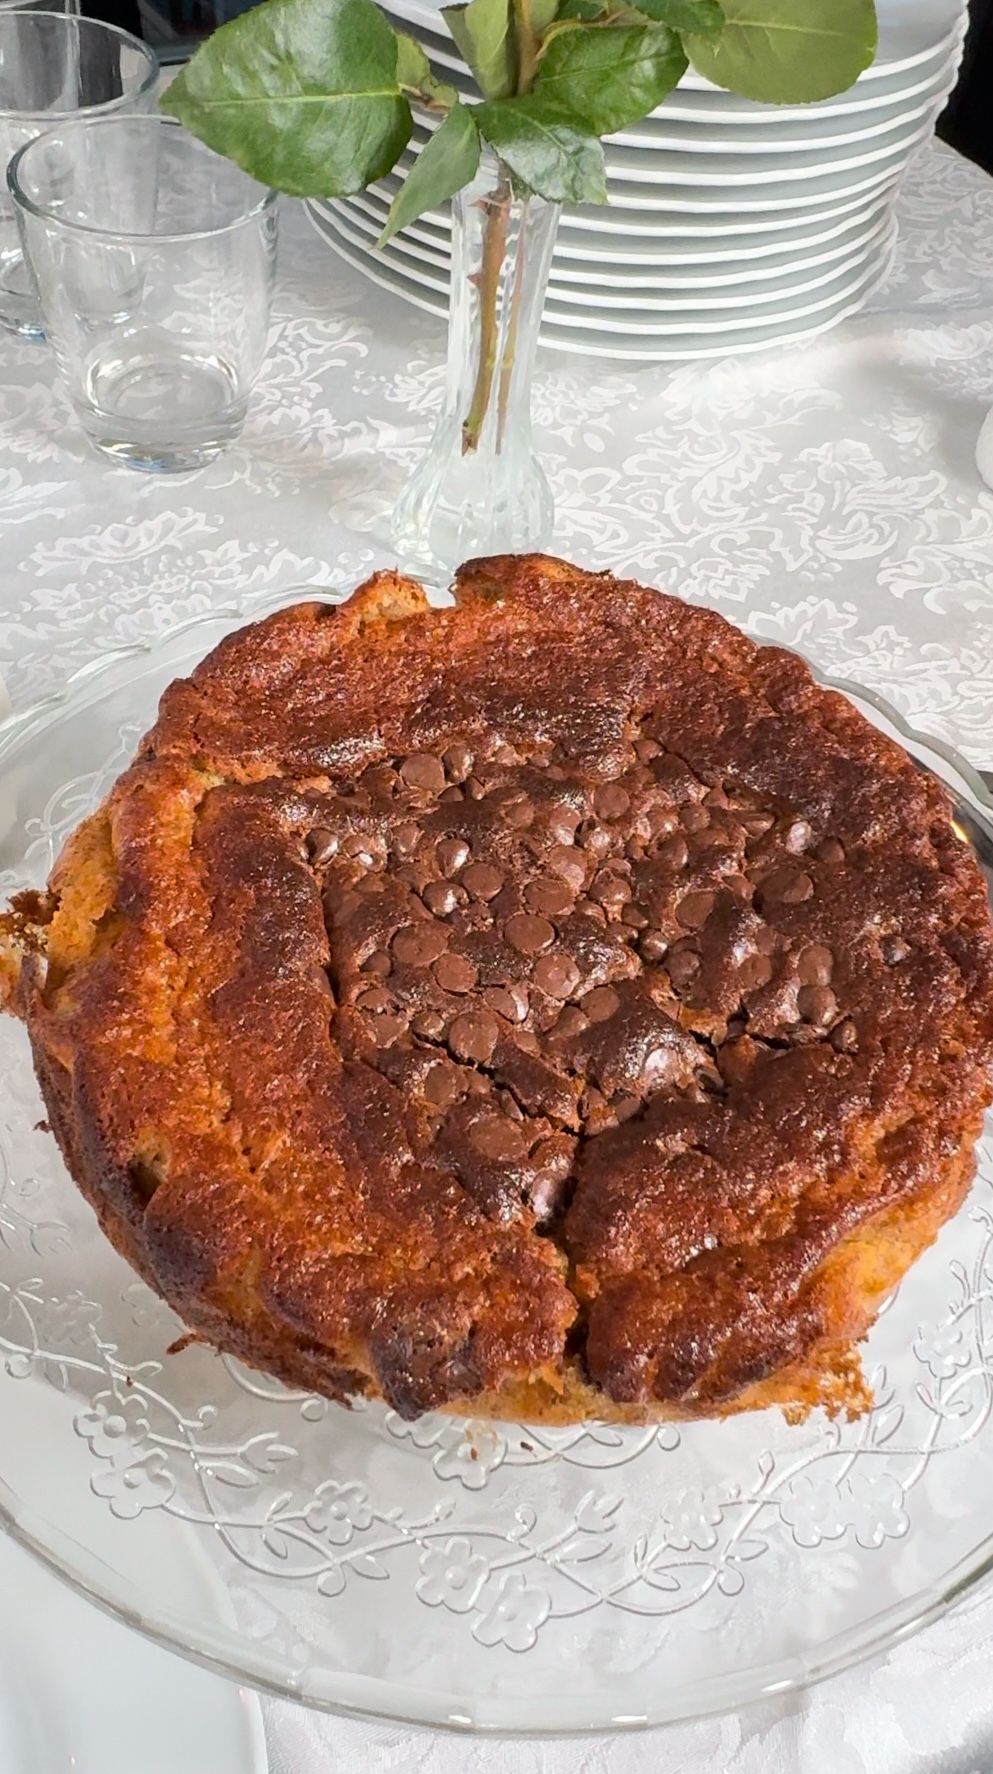
Ingredients:
• 1 ½ cups (380g) ripe mashed bananas (about 3-4 medium bananas)
• ½ cup (100g) packed light brown sugar
• ½ cup (100g) granulated sugar
• ½ cup (110g) unsalted butter, melted and slightly cooled
• 2 large eggs, room temperature
• 1 tsp pure vanilla extract
• ½ cup (130g) 2% Greek yogurt (or sour cream)
• 1 ⅓ cups (180g) gluten-free all-purpose flour (with xanthan gum)
• 1 tsp baking soda
• ½ tsp salt
• ¾ cup (140g) chocolate chips (plus a handful for topping)
Instructions:
1. Prep the Oven and Pan:
Preheat your oven to 350°F (175°C). Grease and line a loaf pan with parchment paper, leaving a bit of overhang for easy removal.
2. Combine Dry Ingredients:
In a medium bowl, whisk together the gluten-free flour, baking soda, and salt. Set aside.
3. Mix Wet Ingredients:
In a large mixing bowl, combine the melted butter, brown sugar, and granulated sugar. Whisk until smooth and creamy.
4. Add Bananas and More:
Stir in the mashed bananas until well incorporated. Add the eggs, Greek yogurt, and vanilla extract, mixing until smooth.
5. Incorporate Dry Ingredients:
Gradually fold the dry ingredients into the wet mixture using a spatula. Be careful not to overmix—stop as soon as the flour disappears.
6. Add Chocolate Chips:
Fold in most of the chocolate chips, saving a handful for sprinkling on top.
7. Pour and Bake:
Pour the batter into the prepared pan, spreading it evenly. Sprinkle the reserved chocolate chips on top for a lovely finish.
8. Bake:
Bake for 60–75 minutes, or until a toothpick inserted into the center comes out with just a few moist crumbs (not wet batter). If the top browns too quickly, tent it with foil during the last 20 minutes.
9. Cool Completely:
Let the cake cool in the pan for 10 minutes, then use the parchment overhang to lift it onto a wire rack. Cool completely before slicing for the best texture.
Tips for Success:
• Bananas: Use very ripe bananas with plenty of brown spots for the sweetest flavor.
• Texture: For extra fluffiness, sift your dry ingredients before whisking them together.
• Storage: Wrap the cooled cake tightly in plastic wrap or store in an airtight container at room temperature for up to 3 days.
Gluten-Free Garlic Rice

Ingredients:
1 cup gluten-free basmati rice
6 cloves garlic, finely minced
2 tablespoons extra virgin olive oil (or butter for extra flavor)
1 teaspoon kosher salt (adjust to taste)
2 cups cold water
Optional: freshly chopped parsley or grated Parmesan for garnish
Preparation:
Toast the Garlic:
Heat the olive oil in a medium saucepan over medium heat. Add the minced garlic, stir in the salt, then p and sauté until fragrant and golden, about 1–2 minutes. Stir frequently to prevent burning.Toast the Rice:
Add the rice to the pan and mix well with the garlic and oil. Toast for 1–2 minutes, stirring constantly, until the rice is lightly coated and fragrant.Add Water:
Pour in the 2 cups of water. Bring the mixture to a gentle boil.Simmer the Rice:
Once boiling, reduce the heat to low and cover the pan, leaving the lid slightly ajar to let steam escape. Cook undisturbed for about 10–15 minutes, or until most of the water is absorbed.Steam to Finish:
Turn off the heat and fully cover the pan with the lid. Let the rice steam for another 10 minutes, allowing it to finish cooking in its own heat and become fluffy.Fluff and Serve:
Use a fork to fluff the rice before serving. Garnish with fresh parsley, a squeeze of lemon, or a sprinkle of grated Parmesan for added flavor.
Tips for Perfect Garlic Rice:
Use cold water for even cooking and fluffier rice.
If you love bold garlic flavor, reserve a small portion of the golden garlic to sprinkle on top as a garnish.
Pair with grilled meats, roasted vegetables, or serve as a side for curries and stews.
Enjoy your flavorful, gluten-free garlic rice!
Gluten-Free Burger
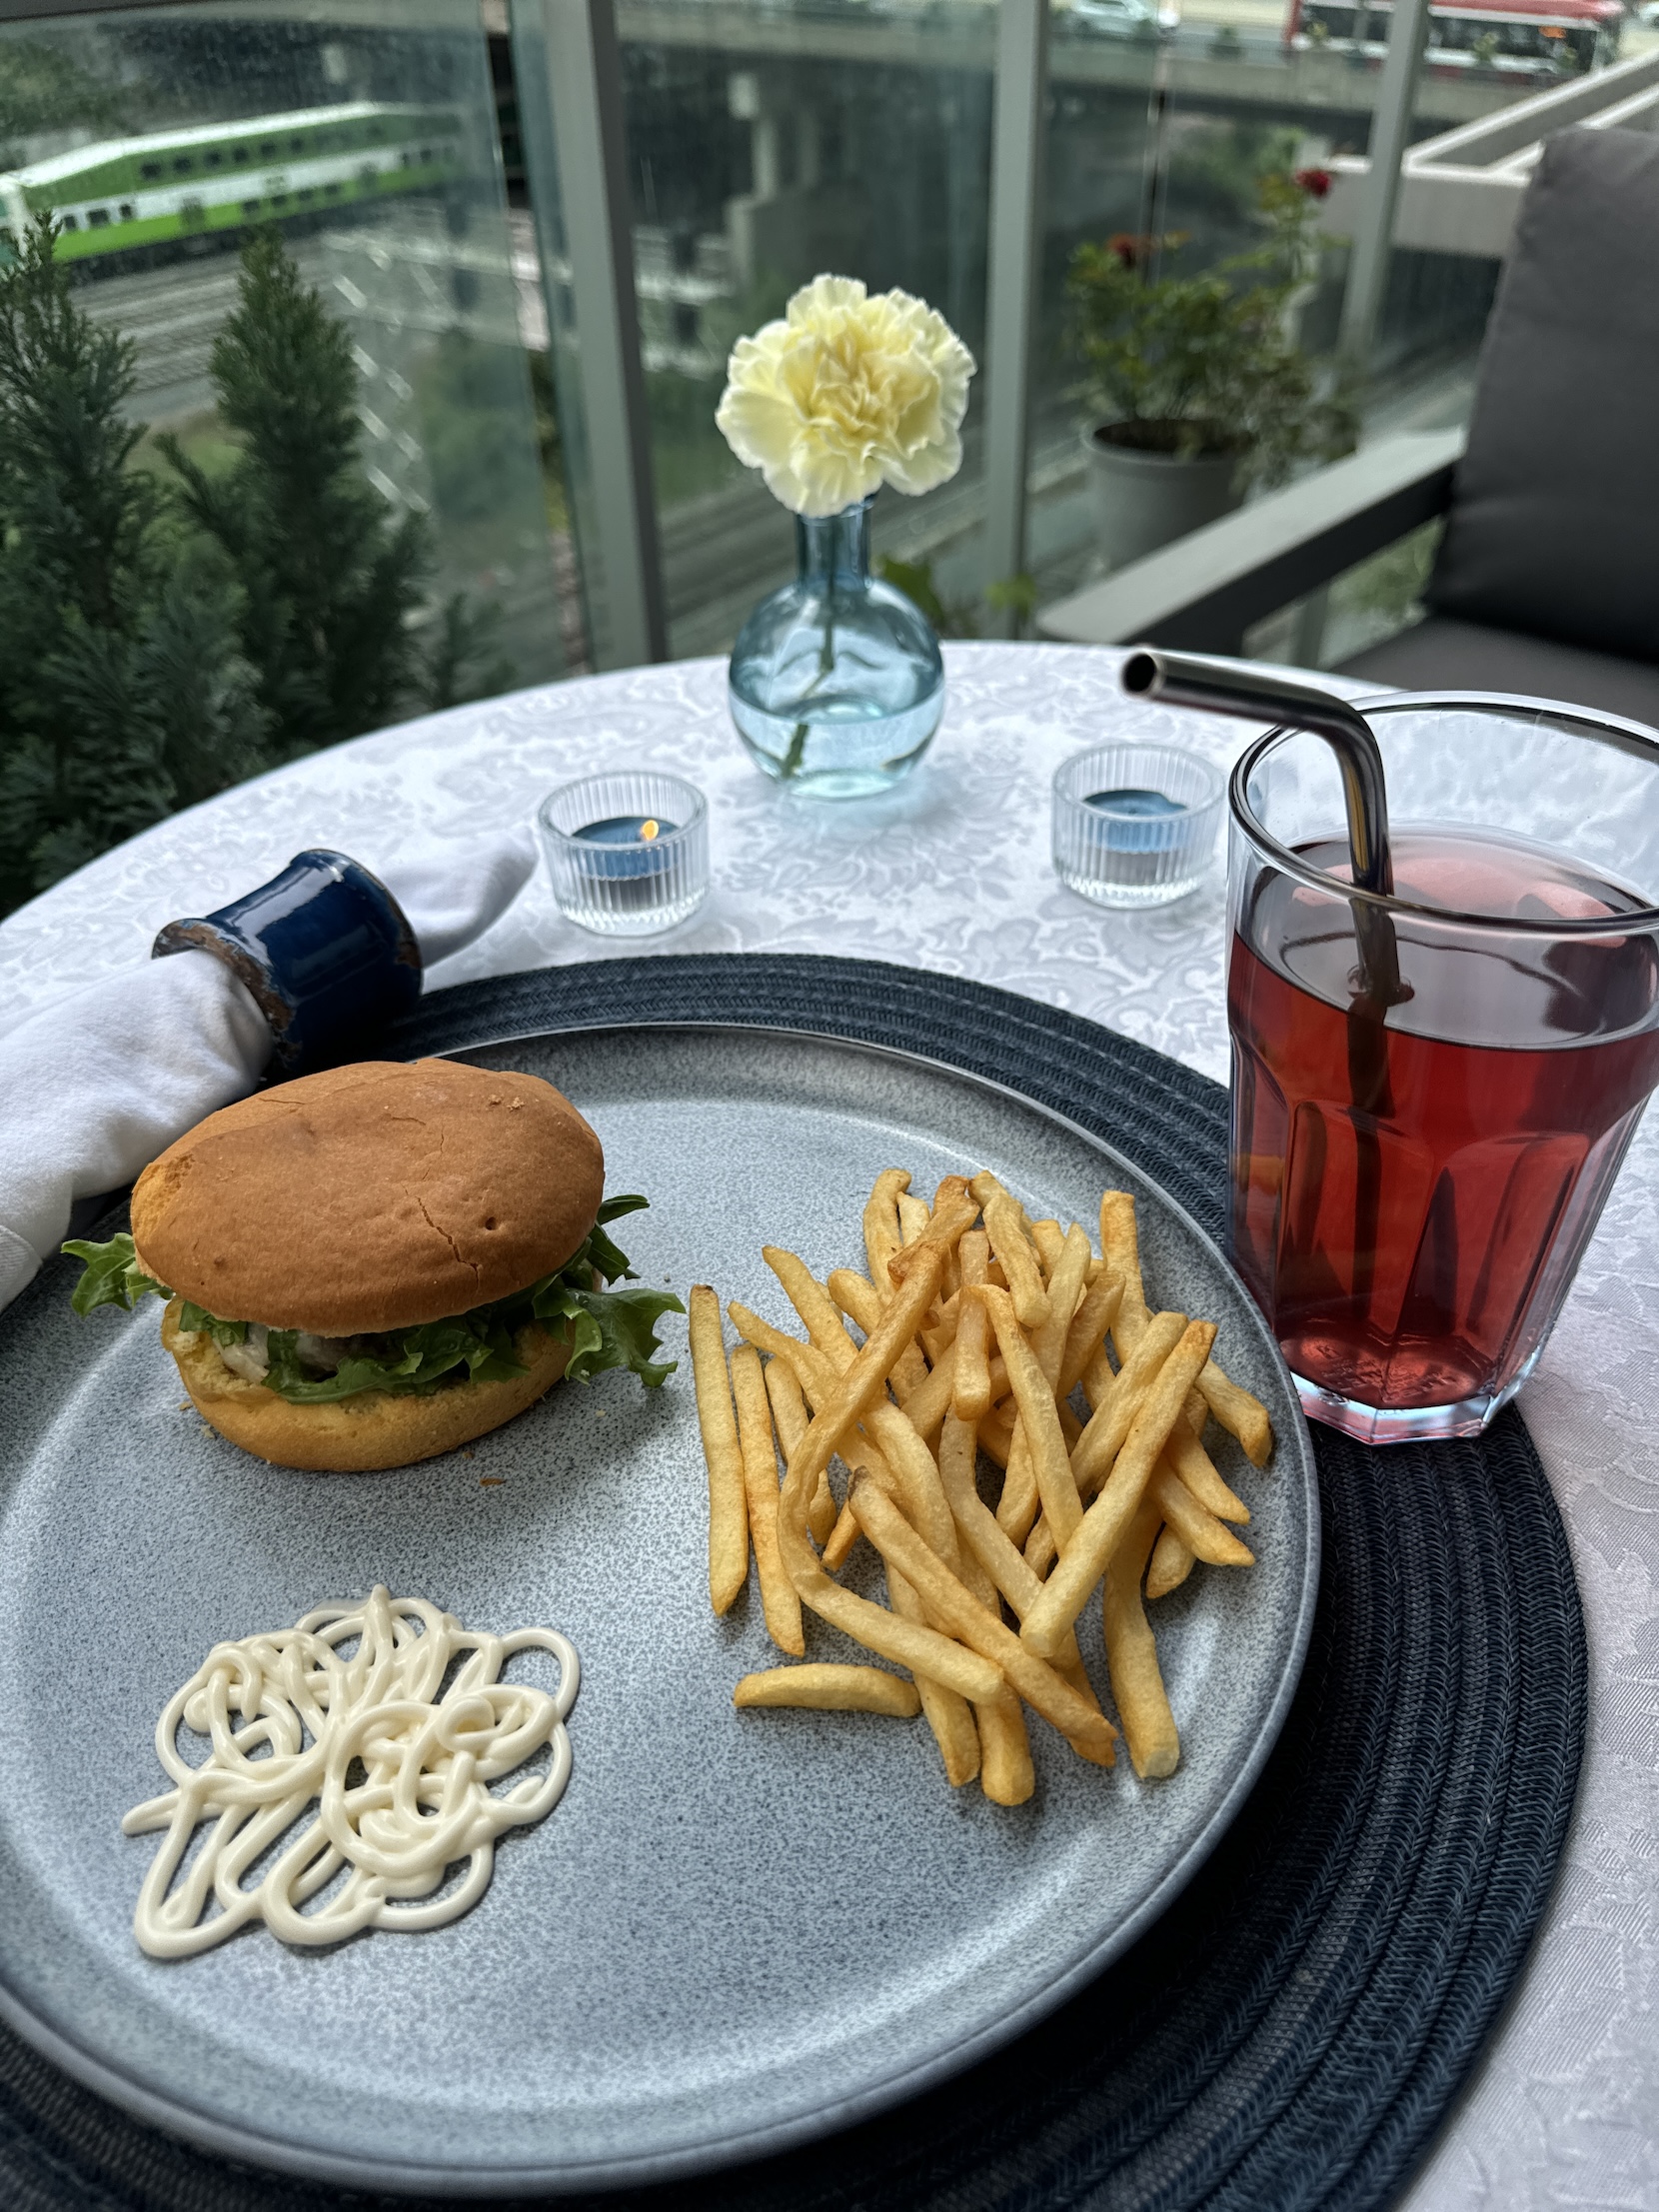
Ingredients:
For the Burger Patties:
300 g ground beef (80% lean for juiciness)
4 garlic cloves, minced
1 small onion, finely chopped
1 teaspoon salt (adjust to taste)
Olive oil, for cooking
1 tablespoon butter (prevents burning and adds flavor)
For the Assembly:
Gluten-free burger buns
Sliced cheese (cheddar, Swiss, or your favorite)
Lettuce leaves
Mayonnaise and ketchup (or your preferred condiments)
Optional toppings: tomato slices, pickles, caramelized onions, or avocado
Preparation:
1. Prepare the Burger Patties:
In a large bowl, combine the ground beef, garlic, onion and salt. Mix gently with your hands until just combined—overmixing can make the patties dense.
Shape the mixture into burger patties, slightly wider than the buns to account for shrinkage during cooking. Make them evenly flat for even cooking.
2. Cook the Burgers:
Heat a nonstick frying pan over medium heat and add a drizzle of olive oil and the butter.
Once the pan is hot, add the patties. Flatten slightly with a spatula and cover the pan with a lid. Cook for about 3–4 minutes until the bottom is golden brown.
Flip the patties, place a slice of cheese on top of each, and cover again. Cook for another 3–4 minutes until the cheese is melted and the patties are cooked to your liking. Remove from heat and let them rest, covered, for a few minutes to retain juices.
3. Toast the Gluten-Free Buns:
In a separate preheated nonstick pan, spread a thin layer of butter on the inside of the gluten-free burger buns. Place them cut-side down and toast until golden and slightly crispy.
4. Assemble the Burgers:
Spread mayonnaise and ketchup (or your favorite sauces) on the toasted buns.
Layer the lettuce on the bottom bun to prevent it from getting soggy.
Place the burger patty on top, allowing the melted cheese to shine.
Add any additional toppings, like tomato slices, pickles, or avocado, then cover with the top bun.
5. Serve:
Pair your burger with air-fried fries, a fresh salad, or your favorite side. A refreshing juice or sparkling water makes for the perfect combo!
Tips for the Perfect Gluten-Free Burger:
Juicy Patties: Don’t press down on the burgers while they cook—it squeezes out the juices.
Even Cooking: Make a slight indentation in the center of each patty before cooking to help them cook evenly without puffing up.
Caramelized Onion Upgrade: Sauté sliced onions in the pan after cooking the burgers for an extra sweet and savory topping.
Gluten-Free Bun Swap: If you prefer a lighter option, use large lettuce leaves or portobello mushrooms as a bun alternative.
Stuffed Mushrooms with Goat Cheese
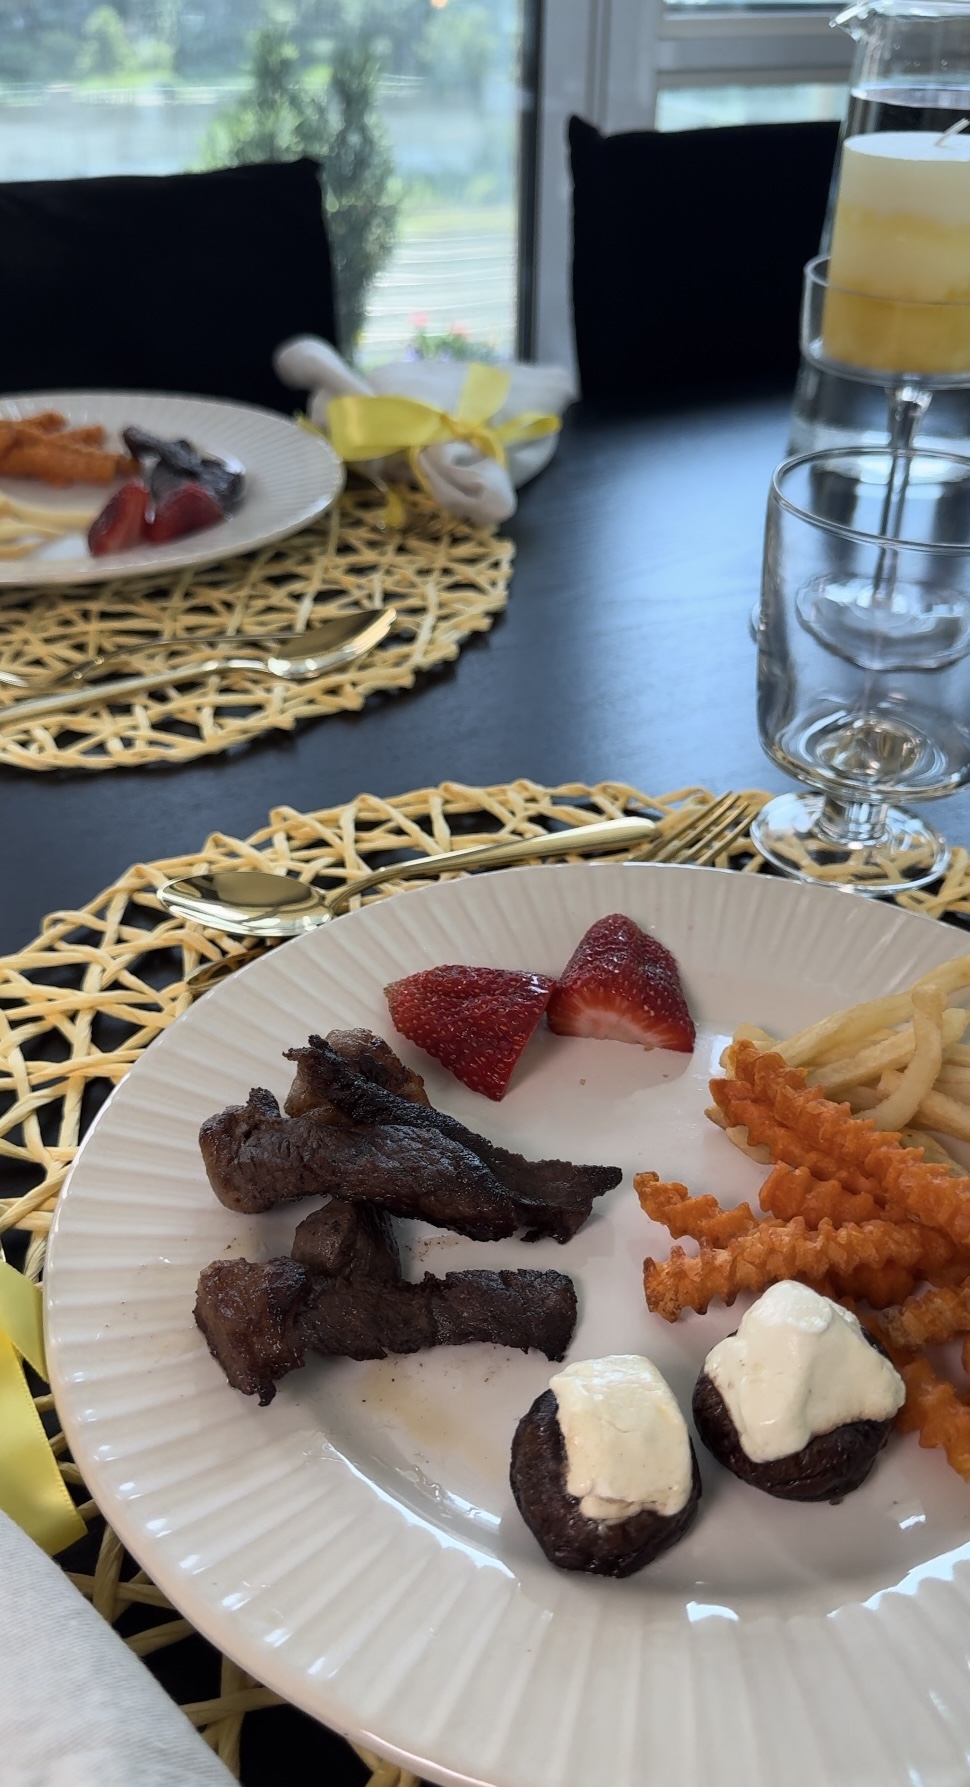
Ingredients:
Mushrooms (as many as you’d like, medium-sized work best)
Goat cheese (enough to fill the mushrooms)
Salt (to taste)
Olive oil
Preparation:
1. Prepare the Mushrooms:
Wash the mushrooms thoroughly and pat them dry with a clean towel. Removing excess moisture ensures they cook evenly.
Carefully remove the stalks to create a cavity for the goat cheese.
2. Preheat the Pan:
Heat a frying pan over medium heat with a drizzle of olive oil. Avoid overheating the oil to prevent burning.
3. Cook the Mushrooms:
Place the mushrooms in the pan, cavity side up, and cover with a lid. Let them cook for 1 minute to soften.
Sprinkle a pinch of salt over the mushrooms, cover again, and cook for another minute.
4. Remove Excess Liquid:
Drain any excess liquid released by the mushrooms to prevent them from becoming soggy.
5. Add the Goat Cheese:
Fill each mushroom cavity with a cube of goat cheese. Cover the pan and cook for 1–2 more minutes, or until the cheese is soft and slightly melted.
6. Serve:
Transfer the mushrooms to a serving dish. Garnish with a drizzle of olive oil or a sprinkle of fresh herbs like thyme or parsley for added flavor.
Tips for the Perfect Stuffed Mushrooms:
Extra Flavor: Add a touch of minced garlic or chopped fresh herbs to the goat cheese for a flavor boost.
Cheese Options: While goat cheese is rich and creamy, you can also experiment with feta or cream cheese as an alternative.
Oven Option: For a slightly crispier texture, bake the mushrooms in a preheated oven at 375°F (190°C) for 10–12 minutes instead of using a frying pan.
This simple, delicious recipe makes for a versatile side dish or appetizer, perfect with steak, rice, potatoes, or a fresh salad.
Gluten Free Strawberry Popsicles
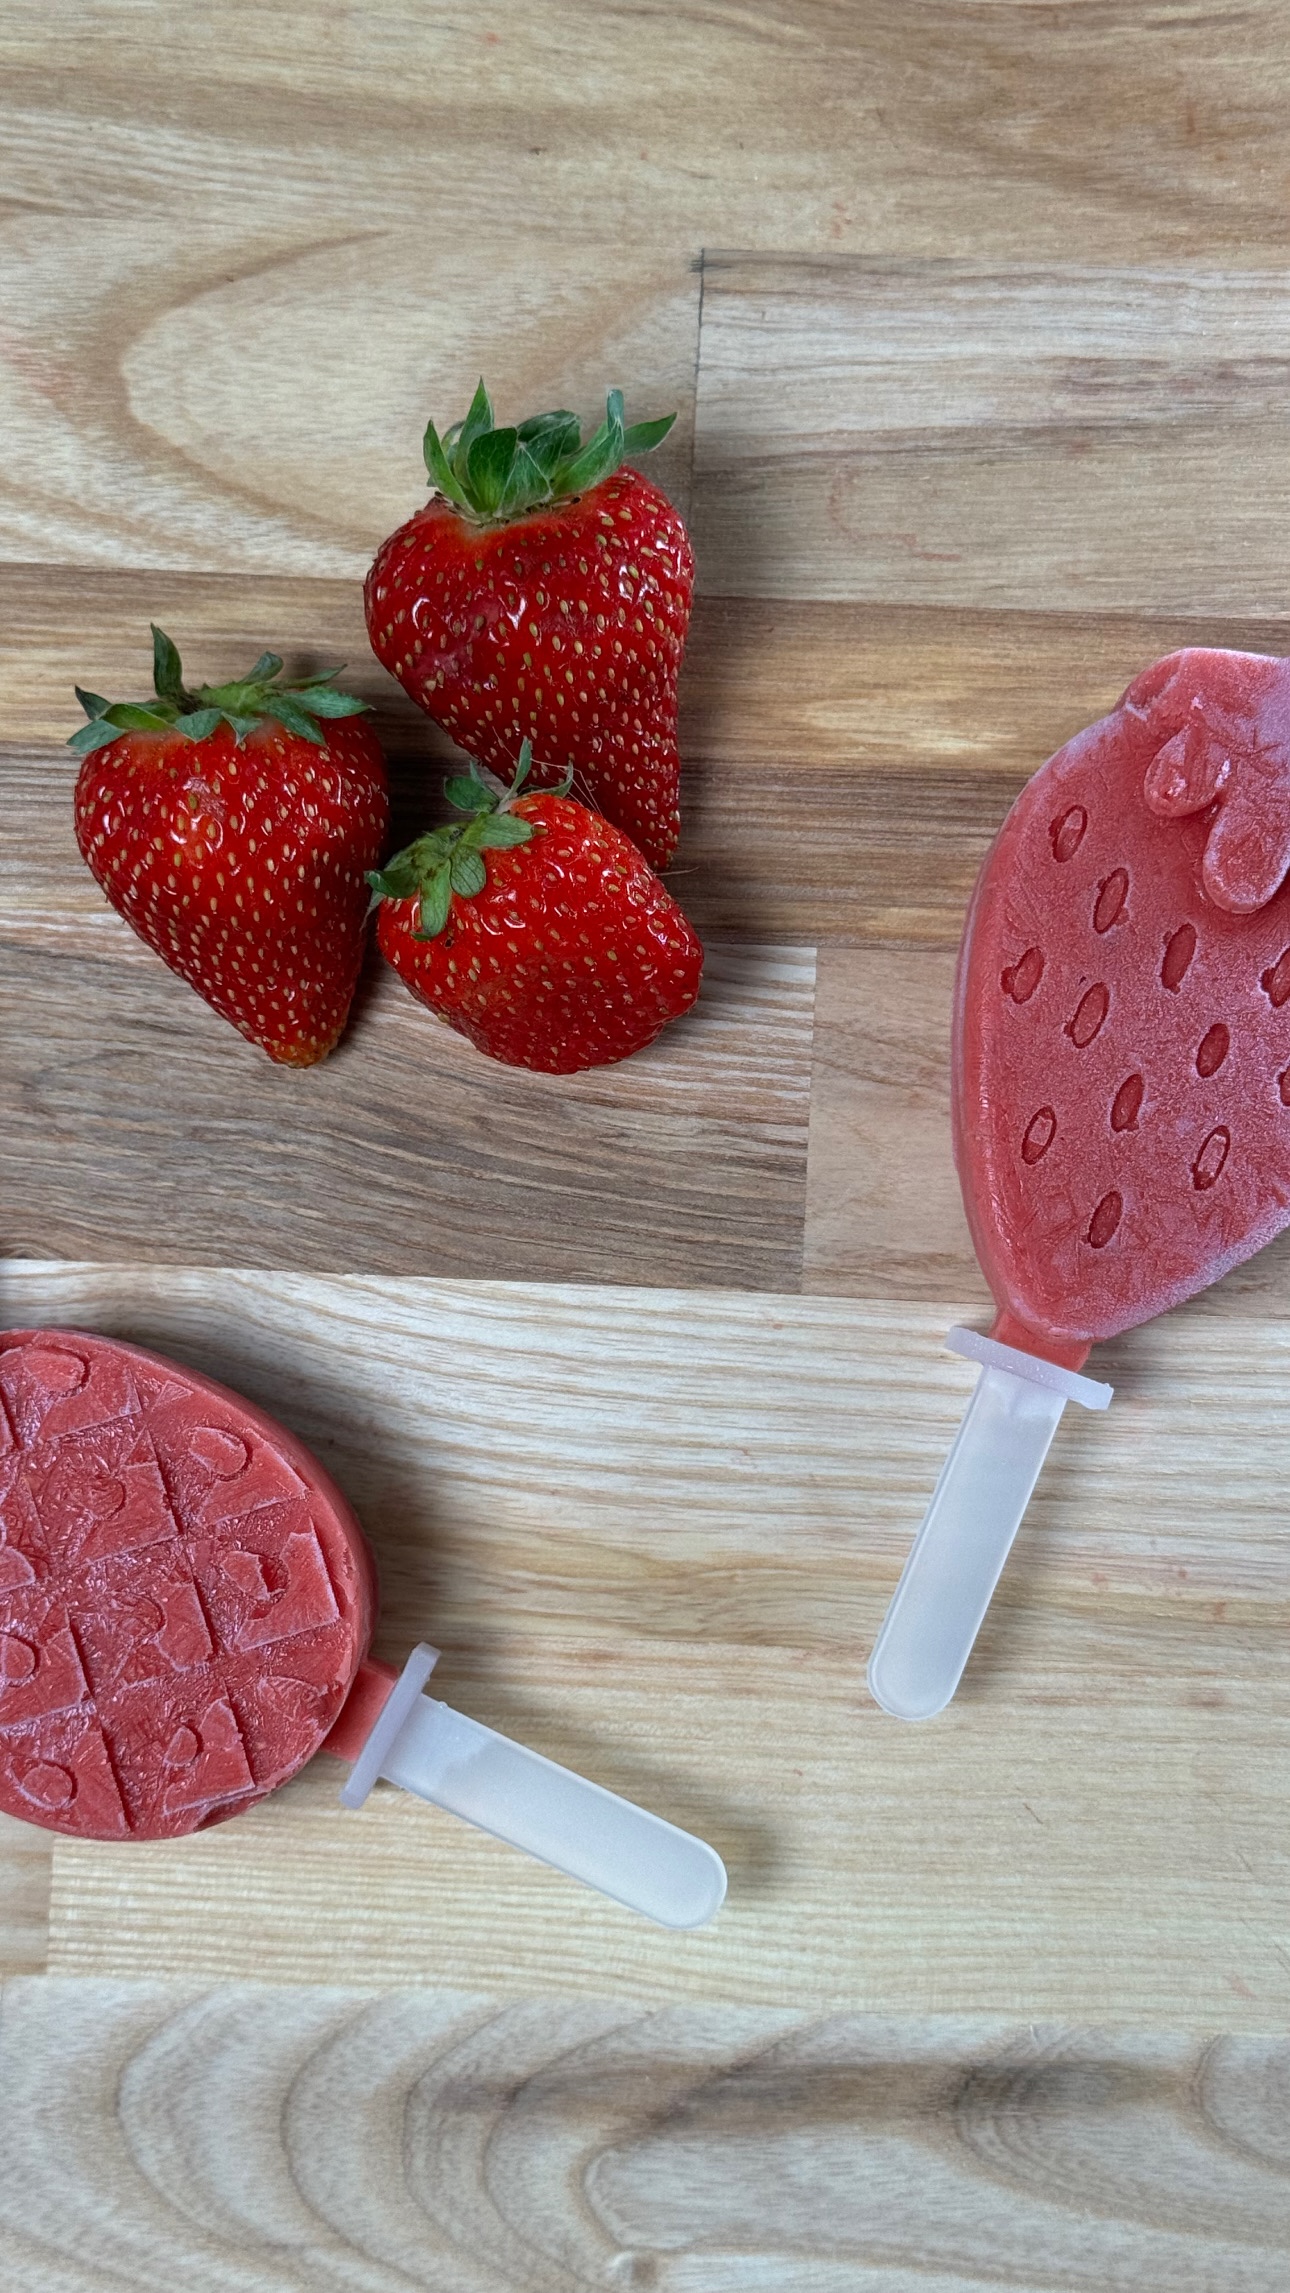
Ingredients:
2 cups fresh strawberries (washed and hulled)
1 cup raspberries (or replace with more strawberries if preferred)
Juice of 1/5 lemon (about 1 teaspoon, adjust to taste)
1 cup maple syrup, honey, or your preferred sweetener (condensed milk is great for a creamy twist)
Preparation:
Blend the Ingredients:
Place the strawberries, raspberries, lemon juice, and sweetener in a blender. Blend on high speed until the mixture is smooth and well combined.
Taste and Adjust:
Taste the mixture and adjust the sweetness or tartness by adding more sweetener or lemon juice as desired.
Fill the Molds:
Pour the mixture evenly into popsicle molds, leaving a small gap at the top to allow for expansion during freezing. Insert popsicle sticks.
Freeze:
Place the molds in the freezer and let them freeze for at least 4 hours or until the popsicles are completely solid.
Serve:
To remove the popsicles, run the molds under warm water for a few seconds to loosen them. Serve immediately and enjoy!
Tips for the Perfect Popsicles:
Extra Texture: Add small pieces of chopped strawberries or whole raspberries into the molds before pouring the mixture for a burst of fruity texture.
Creamy Variation: Replace half the sweetener with 1/2 cup of Greek yogurt or coconut milk for creamy popsicles.
Garnish: Dip the frozen popsicles in melted chocolate and sprinkle with crushed nuts for an indulgent treat.
Enjoy these homemade strawberry popsicles—perfect for a sunny day or a refreshing snack!
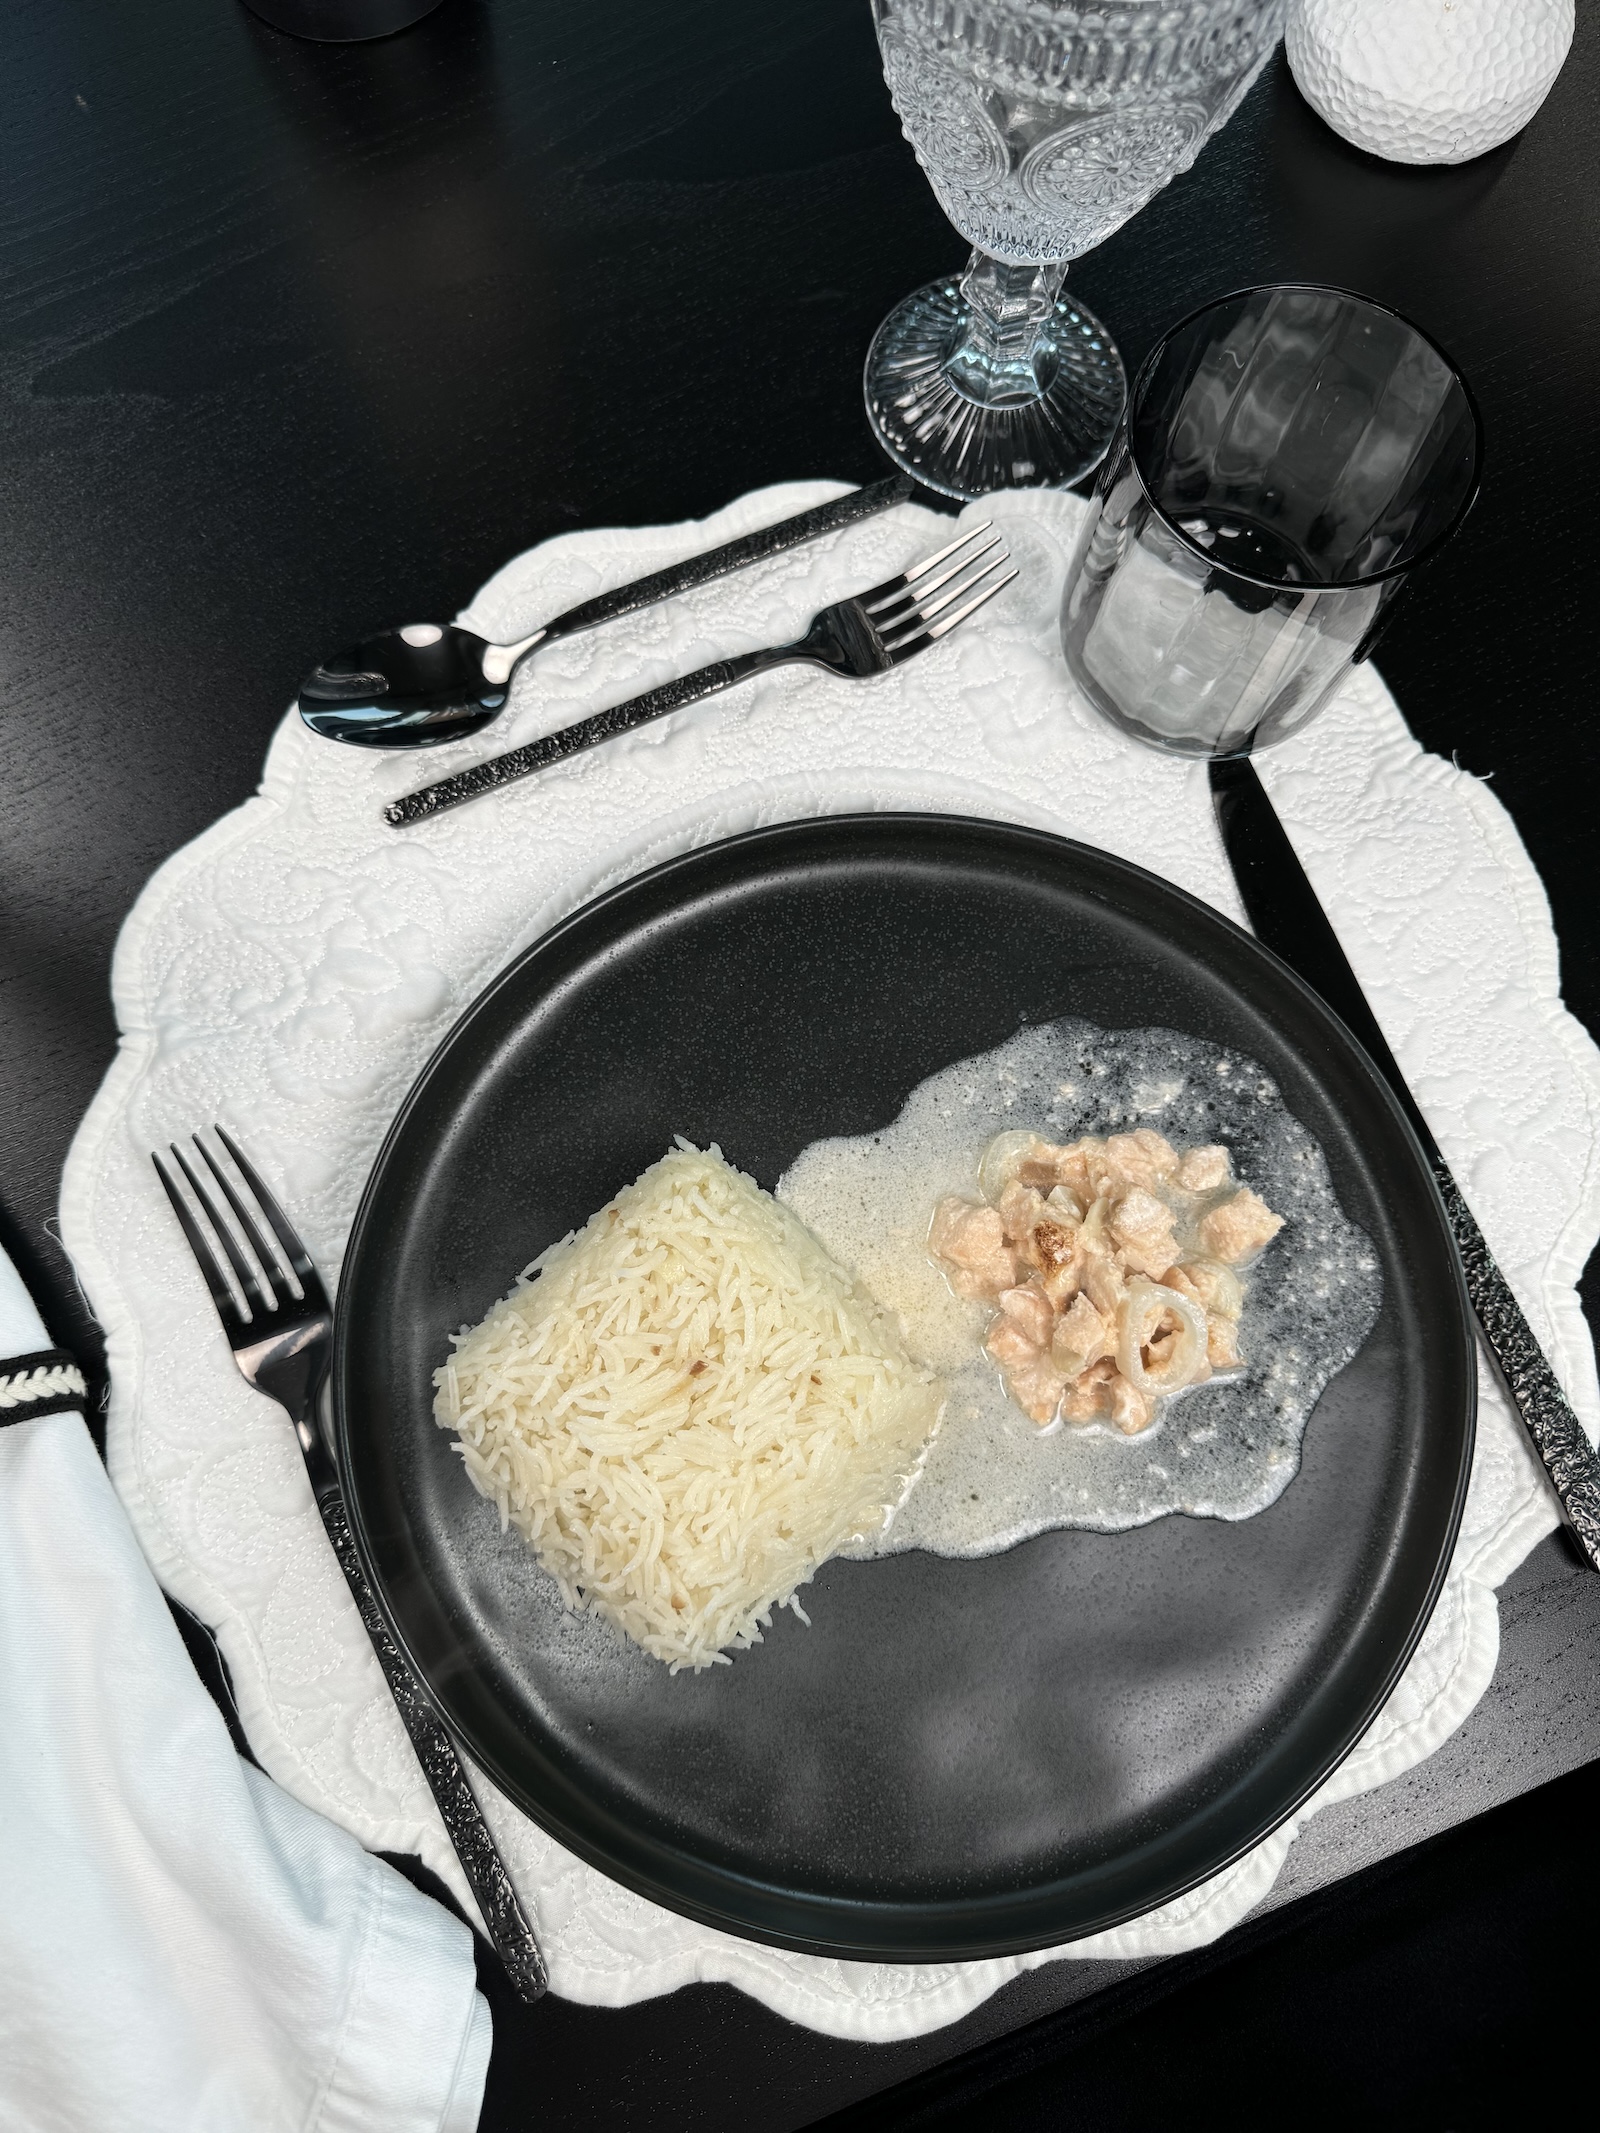
Gluten-Free Coconut Milk Salmon
Ingredients:
Salmon fillets or steaks (adjust amount as needed)
3–4 garlic cloves, minced
1 medium onion, sliced into rings
2–3 tablespoons olive oil
Salt, to taste
Juice of 1/2 lemon (adjust to avoid overpowering the dish)
Coconut milk (enough to fully cover the salmon)
Preparation:
Preheat the Oven:
Preheat your oven to 375°F (190°C).Prepare the Salmon:
Place the salmon fillets in an oven-safe baking dish in a single layer.
Sprinkle salt evenly over the fish.
Add Aromatics:
Distribute the onion rings over and around the salmon.
Sprinkle the minced garlic evenly across the dish.
Season:
Drizzle olive oil over the fish and aromatics.
Squeeze the lemon juice over the fish, ensuring not to add too much to overpower the creamy coconut milk flavor.
Add the Coconut Milk:
Pour the coconut milk over the salmon until it is completely submerged.
Bake:
Cover the baking dish with foil and bake in the preheated oven for 20 minutes.
Remove the foil and continue baking for another 10–15 minutes, or until the top is golden and the salmon is cooked through (internal temperature of 145°F/63°C).
Serve:
Carefully remove the dish from the oven and let it rest for 5 minutes. Serve the salmon with its creamy coconut sauce over rice and a side of steamed or roasted vegetables.
Tips for Success:
Enhance the Flavor: Add a few sprigs of fresh herbs like thyme, parsley, or cilantro to the coconut milk for added aroma.
Optional Add-ins: Add a touch of turmeric or ginger to the coconut milk for a warm, earthy flavor.
Crispier Top: Broil the salmon for 2–3 minutes after baking for a lightly caramelized top.
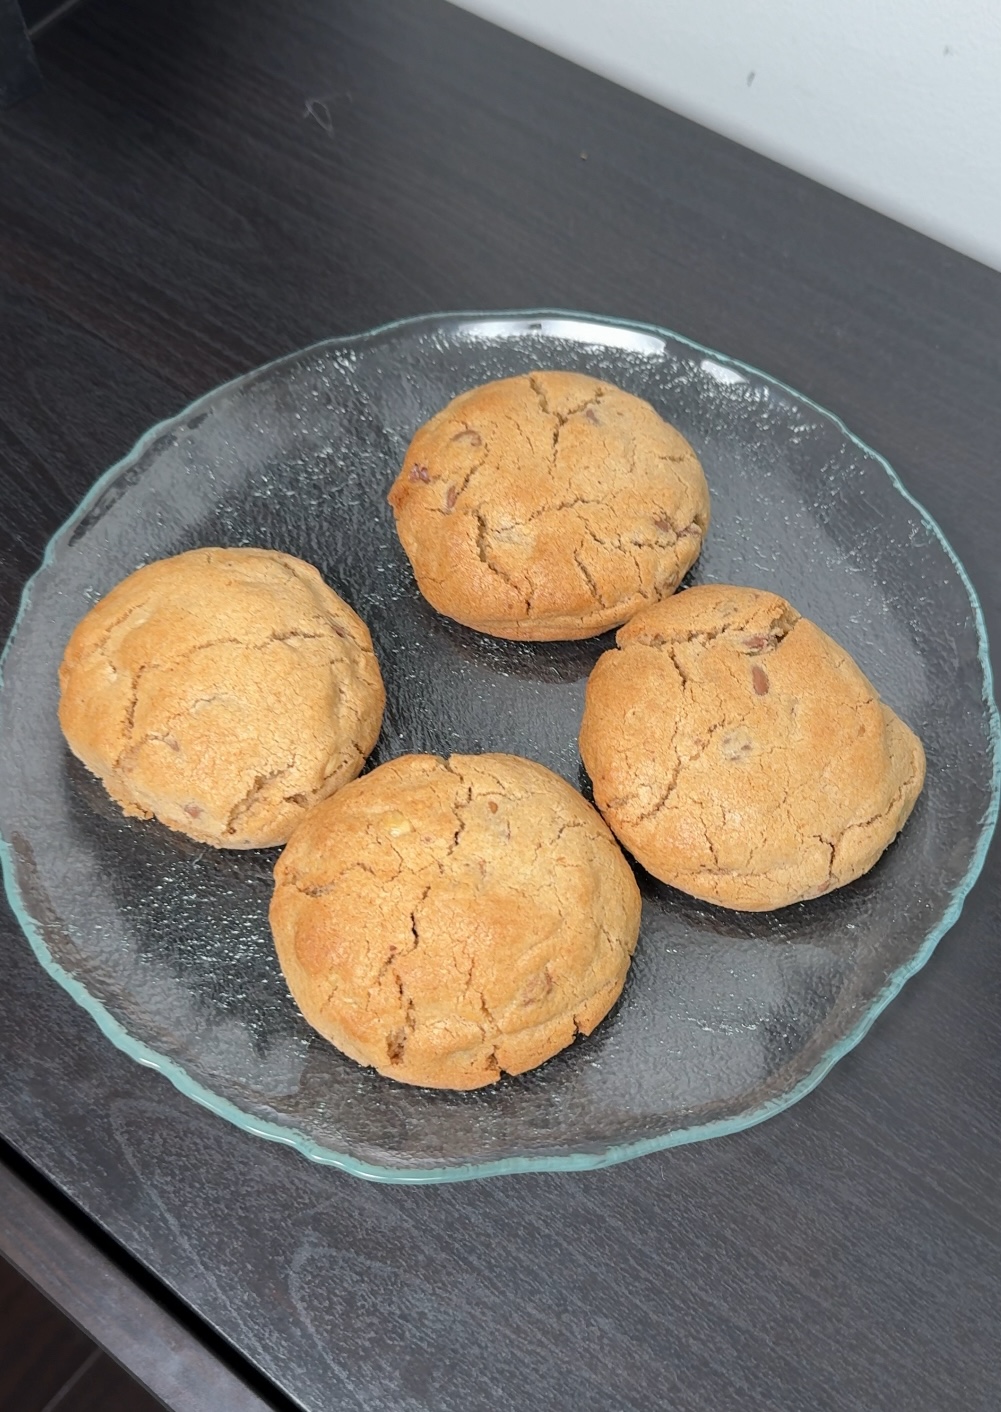
Gluten-Free Chocolate Chip Cookies
Ingredients:
100 g walnuts (chopped, skin removed)
400 g milk chocolate chips
230 g cold butter, cubed
160 g caster sugar
160 g soft light brown sugar
500 g gluten-free all-purpose flour (such as Bob’s Red Mill)
1 1/4 tsp salt
1/4 tsp bicarbonate of soda (baking soda)
6 tsp baking powder
2 large eggs
Preparation:
Prepare the Mixer:
In a large mixing bowl, add the walnuts, chocolate chips, and cubed cold butter. Use a mixer to combine until the butter is slightly softened and incorporated with the nuts and chocolate.Cream the Sugars and Butter:
Add the caster sugar and soft light brown sugar to the mixture. Beat on medium speed until the mixture becomes light and fluffy.Mix the Dry Ingredients:
In a separate bowl, whisk together the gluten-free flour, baking powder, bicarbonate of soda, and salt. Slowly add this dry mixture to the wet ingredients, mixing on low speed until just combined.Incorporate the Eggs:
Add the eggs one at a time, mixing after each addition, until the dough is fully combined and smooth.Portion the Dough:
Measure out 125 grams (4 ounces) of dough for each cookie. Shape into balls or discs and place them on a tray lined with parchment paper.Chill the Dough:
Transfer the cookie dough portions to the freezer and freeze for at least 24 hours. This step enhances the flavor and texture of the cookies.Bake the Cookies:
Preheat your oven to 350°F (180°C). Place the frozen cookie dough balls on a lined baking sheet, leaving space between each one. Bake for 20–23 minutes, or until the edges are golden brown and the centers look slightly soft.Cool Completely:
Allow the cookies to cool on the baking sheet for at least 10 minutes before transferring them to a wire rack. This helps them set and prevents them from breaking.
Tips for Perfect Cookies:
Flavor Boost: Toast the walnuts before adding them for a richer, nuttier flavor.
Chewy Centers: Slightly underbake the cookies for gooey centers.
Storage: Store baked cookies in an airtight container at room temperature for up to 5 days or freeze for longer storage.
These gluten-free chocolate chip cookies are rich, chewy, and absolutely irresistible! Let me know how they turn out. 😊
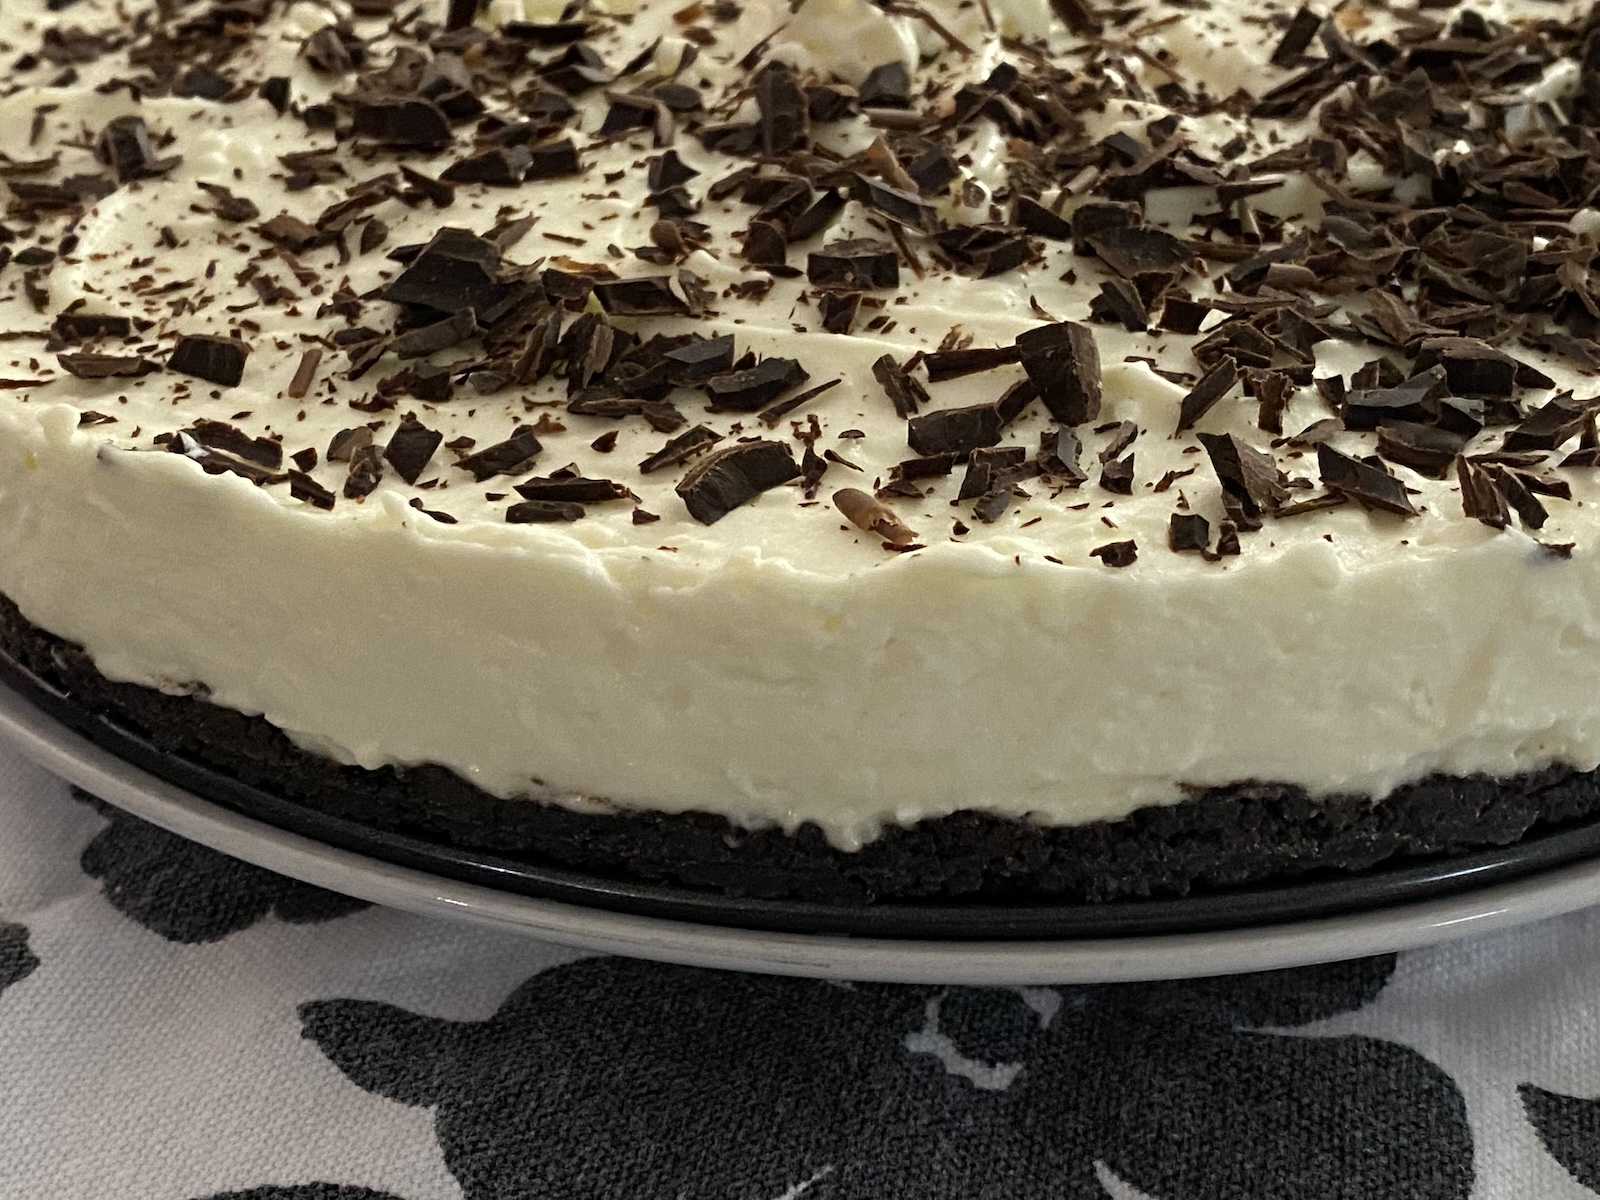
Gluten-Free Cheesecake
Ingredients:
1 box of gluten-free Oreo cookies (you’ll need 32 cookies)
100 grams unsalted butter, melted
400 grams cream cheese (softened)
500 ml whipping cream (chilled)
120 grams sugar (do not substitute with sweeteners)
Tools Needed:
Food processor
Mixer or whisk
Preparation Steps:
1. Make the Base:
Crush the gluten-free Oreos in a food processor until they turn into fine crumbs.
Add the melted butter to the crumbs and pulse until well combined. The mixture should resemble wet sand.
Press the Oreo mixture evenly into the bottom of a springform pan, ensuring the base is firm and compact.
Chill the base in the refrigerator for 1–2 hours to set.
2. Prepare the Cheesecake Filling:
Using a mixer, whip the chilled whipping cream and sugar together until stiff peaks form. This will create a light and airy texture for your cheesecake.
In a separate bowl, warm the cream cheese in the microwave for about 10 seconds to soften it (do not overheat).
Gradually fold the softened cream cheese into the whipped cream mixture, combining gently to avoid deflating the whipped cream.
If there are any lumps, use a whisk or hand mixer on low speed to create a smooth, lump-free filling.
3. Assemble the Cheesecake:
Pour the cream cheese filling over the chilled Oreo base, spreading it evenly with a spatula.
Smooth the top for a neat finish.
4. Chill and Set:
Cover the cheesecake with plastic wrap or foil and refrigerate for at least 12 hours to allow it to set. For the best texture and flavor, chill it for 24 hours.
5. Serve:
Carefully remove the cheesecake from the springform pan and transfer to a serving plate.
Garnish with crushed gluten-free Oreos, whipped cream, or fresh fruit for an elegant touch.
Tips for Success:
Room Temperature Ingredients: Ensure the cream cheese and butter are at room temperature before mixing for a smoother filling and base.
Avoid Overmixing: Be gentle when folding the cream cheese into the whipped cream to maintain the cheesecake’s light texture.
Freezing Option: If you’re in a hurry, freeze the cheesecake for 4–6 hours instead of refrigerating. Let it sit at room temperature for 15 minutes before serving.
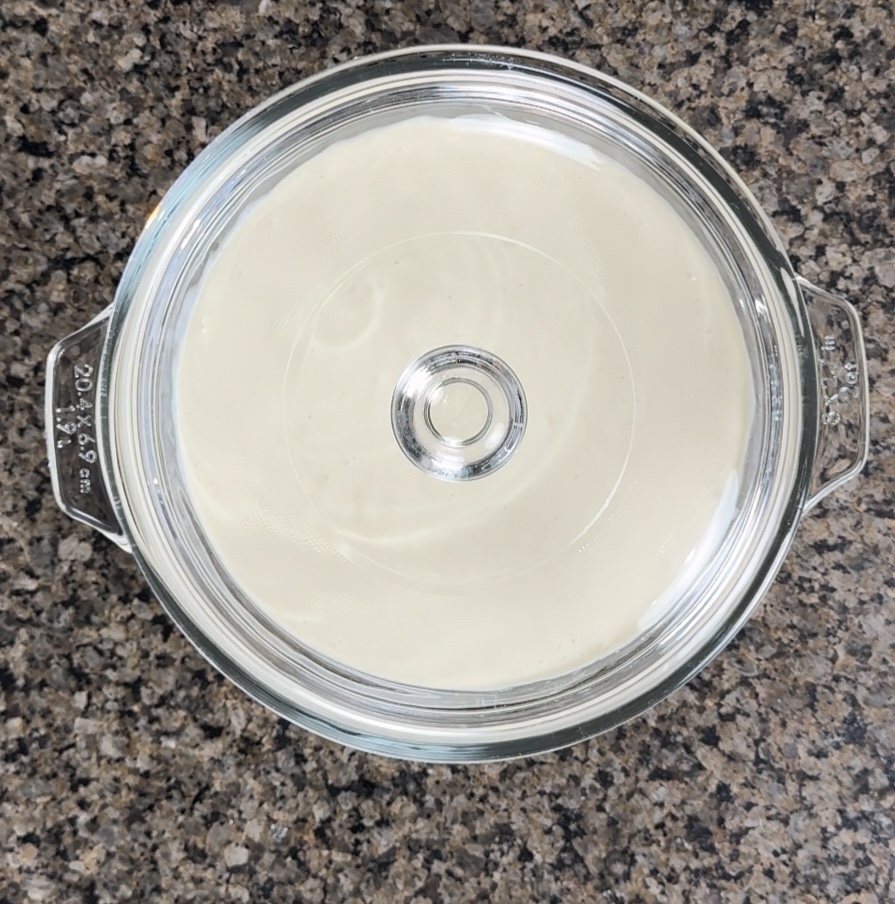
Light & Creamy Gluten-Free Lemon Mousse
Ingredients
1 can sweetened condensed milk
1 cup heavy whipping cream (35% or more)
Juice of 1 large lemon
You’ll need a blender for this recipe.
Preparation
Blend the Ingredients:
Add the sweetened condensed milk, whipping cream, and lemon juice to a blender.
Blend on medium speed until the mixture thickens and reaches a smooth, creamy consistency.
Chill the Mousse:
Transfer the mousse into serving dishes or a large bowl.
Refrigerate for 1–2 hours to set.
Serve and Enjoy:
Garnish with lemon zest, fresh berries, or a sprig of mint for a festive touch, if desired.
Serve chilled and enjoy this refreshing, gluten-free dessert!
Gluten-Free Chicken Soup

Ingredients:
3 large potatoes
1 large carrot
1 zucchini
Green beans (cut into thin pieces)
1 onion
2–3 garlic cloves
Salt (to taste)
Olive oil (to taste)
1 chicken breast
Equipment Needed:
Pressure cooker
2 medium pots
1 large pot
Hand blender
Preparation:
Cook the Chicken:
In a pressure cooker, place the chicken breast with enough water to fully cover it. Add a pinch of salt and a drizzle of olive oil.
Cook for 30 minutes. Once done, shred or dice the chicken into small pieces and set it aside.
Prepare the Green Beans:
In a medium pot, boil the green beans in salted water until tender.
Drain and set aside.
Cook the Vegetables:
In a large pot, add hot water along with the potatoes, carrot, zucchini, onion, garlic, and a pinch of salt.
Cook until all the vegetables are soft and fully cooked.
Blend the Soup:
Use a hand blender to blend the cooked vegetables into a smooth, creamy consistency.
Combine Everything:
Stir the shredded chicken into the blended soup.
Add the cooked green beans and mix well.
Serve:
Drizzle a bit of olive oil on top before serving if desired. Enjoy your warm, hearty, and healthy chicken soup!
Enjoy:
This gluten-free chicken soup is easy, nourishing, and perfect for a cozy meal. Let me know how it turns out!